


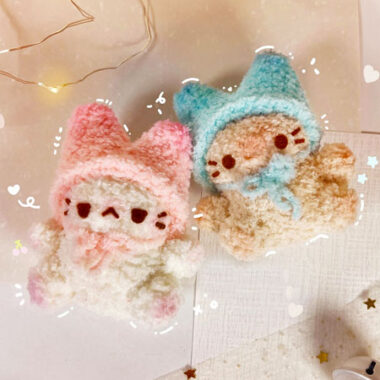
I will introduce you to the cat amigurumi pattern named marie designed by snugglescrochetbyjamie. The cat, made with white and pink plush yarn, has a very soft texture and a very nice facial expression. The designer uses Premier Parfait Chunky brand yarn to make the amigurumi toy. The recommended crochet hook size for the cat is 4.5mm.
Marie the Lady Cat Crochet Pattern Step by Step
You will also learn how to make a cat amigurumi toy using felt to create facial expressions. The toy also has 2 bow ties. One of these bow ties is on its neck and the other is on the top of its head. You will learn how to make these today.
Designer: snugglescrochetbyjamie
Materials
• Yarn (I used Premier Parfait Chunky)
• Main color (white)
• Bow color (pink)
• Hook (I used 4.5mm)
• Yarn needle
• Stuffing
• Stitch marker
• Scissors
• 1 of the following! • Safety eyes
• Sinker eyes
• Felt (glue, pencil and paper for stensil)
Abbreviations
• ch-chain
• slst-slip stitch
• sc-single crochet
• inc-increase
• dec– decrease
• fo-finish off
• dc inc – 2 double crochets in 1 stitch
• hdc – half double crochet

Head
R1 6SC in MR (6)
R2 INC around (12)
R3 (SC, INC) repeat 6 times (18)
R4 SC around (18)
R5 (2SC, INC) repeat 6 times (24)
R6 SC around (24)
R7 (3SC, INC) repeat 6 times (30)
R8 SC around (30)
R9 6SC, 3INC, 12SC, 3INC, 6SC (36)
R10 SC around (36)
R11 7SC, 3DEC, 10SC, 3DEC, 7SC (30)
R12 (3SC, DEC) repeat 6 times (24)
= Attach eyes around R8-9, and beware of where the front of the face is (cheek pockets on both sides).
= Start stuffing. Stretch and shape the fabric so the top of the head is not pointy, especially when using chenille yarn. Make sure you stuff the cheek pockets.
R13 (2SC, DEC) repeat 6 times (18)
F/O, and leave a long tail to sew. Do not close the hole!

Arms (make 2)
R1 5SC in MR (5)
R2 21NC, 3SC (7)
R3 SC around (7)
R4 DEC, 5SC (6)
= Fill the arms as you go.
R5-7 SC around (6) <3 rows>
R8 4SC to align the yarn tail to the side of the arm.
May need to adjust depending on your tension! (6)
R9 3SC through both sides of the round to shut the arm (3)
F/O. No need for a sewing tail
Hair
R1 Surface crochet 4SC in a circle at top of head (4)
R2 SC around (4)
R3 INC around (8)
R4 4SC, 2DEC (6)
R5 DEC around (3)
F/O and leave enough tail to close hole.
Legs (make 2)
R1 Ch4
R2 starting from the 2nd chain from the hook, 2SC, <3SC in the last stitch>, turn to work on the other side of the chain, SC, INC (8) < should be oval shape
R3 (SC, INC) repeat 4 times (12)
R4 3SC, 2DEC, 3SC, DEC (9)
R5 3SC, 2DEC, 2SC (7)
R6 (SC, INC) repeat 3 times, SC (10)
R7 (2SC, INC) repeat 3 times, SC (13)
F/O and leave a long tail to sew. Stuff legs.
Ears (make 2)
R1 4SC in MR (4)
R2 INC around (8)
R3 (3SC, INC) repeat 2 times (10)
R4 (4SC, INC) repeat 2 times (12)
F/O and leave a long tail to sew.
Tail
Stuff lightly as you go.
R1 4SC in MR (4)
R2 (SC, INC) repeat 2 times (6)
R3 21NC, 4SC (8)
R4 (3SC, INC) repeat 2 times (10)
R5-7 SC around (10)
<3 rows>
R8 (3SC, DEC) repeat 2 times (8)
R9 DEC around (4)
F/O and leave a long tail to sew. Do not close hole.
Body
R1 6SC in MR (6)
R2 INC around (12)
R3 (SC, INC) repeat 6 times (18)
R4 (2SC, INC) repeat 6 times (24)
R5 10SC, (SC, INC) repeat 2 times, 10SC (26)
R6-7 SC around (26) <2 rows>
R8 10SC, (SC, DEC) repeat 2 times, 10SC (24)
R9 (2SC, DEC) repeat 6 times (18)
= In the <bold> stitches you will attach the arms by inserting your hook through the stitches on the arms. first, then through the stitches on the body. Start stuffing, and stuff as you go.
R10 15SC, <3SC> (18)
R11 SC, <3SC>, 14SC (18)
R12 SC around (18)
R13 (SC, DEC) repeat 6 times (12)
R14 DEC around (6)
F/O and leave a long tail to sew if you didn’t for the head. Close the hole shut.
Head bow
R1 8SC in MR (8)
R2 – 3DC INC, slst, 3DC INC, slst (6)
F/O and leave a long tail to sew.
The 2 Slst will be the center of the bow. Use the yarn tail to scrunch the middle of the bow, then wrap the yarn around the center 3-4 times.
You can leave the bow as is to sew, OR attach more yarn and chain the circumference of her hair to create a hair band
Large bow
Piece 1
R1 – Ch35
R2 SC into the 1st chain to create a loop, 34SC (35)
R3-8 35HDC (35) <6 rows>
F/O and weave in the tail.

Piece 2
R1 – Ch4
R2 – SC into 2nd chain from the hook, 2SC, turn (3)<< no need to ch1 before turning but you can if you’d like to!
R3-17 SC across, turn (3)

<15 rows>
>> Adjust so the band wraps around the center of piece 1 to sinch
R18 – Ch1, instead of turning, 2SC along the side of the band.
= This will be the start of your collar
R19-48 turn, 2SC (2) <30 rows>
Adjust so the collar reaches around Marie’s neck
F/O and leave a medium length tail to sew the collar closed.

In the end, piece 2 should look like a large “L” shape
Assembly
The body will be slightly slanted forward, so keep that in mind when assembling
Ears
stuff lightly and sew onto each side of the head, 4 rows wide (R3-4, 8-9)

Head
• sew the head slightly behind the last round of the body
• I like to tilt the body until the arms touch the floor, and attach the head to wherever it sits straight
Legs
Sew 4-5 visible stitches apart (they will be facing slightly outwards)
• 4 rows high (R3-4, 7-8)
• make sure the toes are pointing up
Tail
sew onto the body 2 rows wide (R6-8). The curve should be facing up!

Head bow
Sew onto the hair, or if you created a band, squeeze it through the hair
Large bow
1. With some yarn, sinch the middle of piece 1 to create a bow, and tighten with a knot.
2. Take piece 2, and wrap the thicker side of the band around the center of piece 1, and sew the band closed.
3. Make sure the thinner band is aligned with the middle of the bow. You now have a bow with a unattached collar.
4. Wrap the thin band around Marie’s neck, and use the yarn tail to attach it back behind the bow.

Facial Parts
Mouth
1. Embroider an upside-down V shape around R11
2. On the same row as the tip of the V, embroider a nose 2 stitches wide. I embroidered around 3-4 strands!

Eyes
if you are using felt for the eyes, cut them out and attach them around R9-10

ref: Here are the shapes I cut out for the eyes:
