


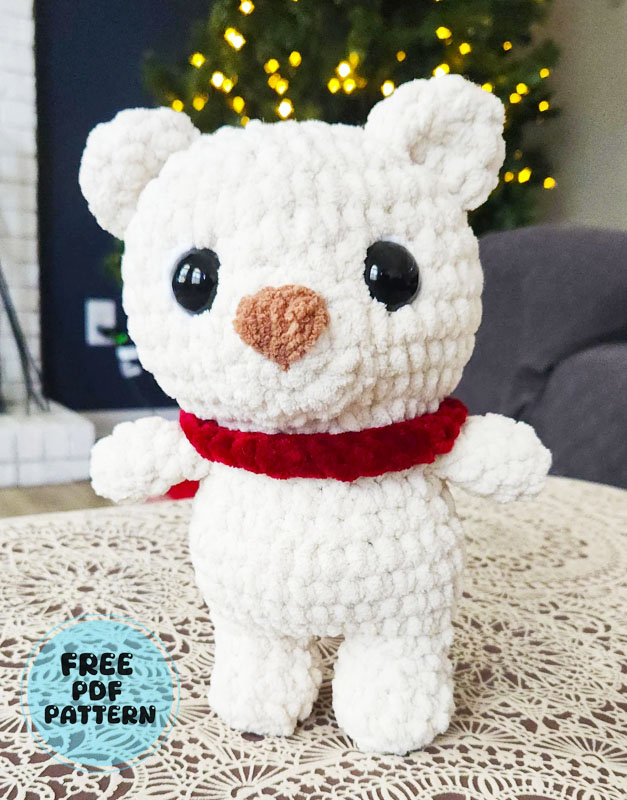
Are you ready to make a crochet snowball bear? The heart-shaped nose of the crochet bear made with basic crochet techniques looks very nice, doesn’t it? We see that the bear with a red scarf has a very large head compared to its body, but we can say that this technique is a very common amigurumi technique. We can say that the quality of the chenille yarn used in making the toy is really high-level.
Plush Snowball Bear Crochet Pattern
You will need a 6.00 mm crochet hook while making the toy and it is recommended that you use 24 mm safety eyes for the eyes of the bear. You can already guess that the eyes are this big at first glance.
Designer: beanandbirdcrochet
Materials
• size 6 Super bulky blanket or other chenille yarn
• 6.0 mm Hook
• 24 mm Safety
• Polyfill Stuffing
• Tapestry needle
• Scissors
• Stitch Marker
Abbreviations
• R– Round
• CH: Chain
• MR: Magic ring
• SC: Single Crochet
• INC: Increase
• DEC: Decrease
• {}x: Repeat the stitches inside the brackets-times(x) the number indicated
***Your finished product may look different depending on your yarn choice, hook size and tension.
This pattern has been created to be a low sew pattern. Arms will be made first and worked
into the pattern later using single crochet stitches. The body and head are made from one piece continuing on from the legs. The ears and muzzle will be the only parts needing to be sewn on at the end.
*The pattern is worked in the round, marking your last stitch and continuing on for each round.
Arms x2
Row 1: 6sc into MR (6)
Row 2: (Sc 1, INC} repeat 3 times (9)
Row 3-5: Sc 9 (9)
Fold arms and close with 4sc stiches across.
Fasten off and set aside to attach later on round 12 of the body.
Next we will start with the legs working up to the body/head
Legs (make 2)
Starting with a MR
R 1: sc 6 into MR (6)
R 2: inc into each stitch (12)
R 3: BLO sc 12 around (12)
R 4: sc 12 around (12)
R 5: {sc 2, dec}x3 (9)
Fasten off and repeat pattern for second leg. Do not fasten off the second leg, ch 3
You will be adding polyfill to the legs and body as you go.
Body
(Body and head will be worked in one piece. continuting up from the feet)
Connect the second leg with a sc stitch to the first leg and and continuing to round 6
R 6: sc 24 (24)
R 7: sc 9, INC into the Next 3 stitches, sc 9, inc into the last 3 stitches (30)
R 8-10: sc 30 For Both Rows (30)
R 11: {sc 3, Dec} repeat 6 times (24)
R 12: sc 24 (24)
we will be attaching arms in the next round
R 13: sc 4, attach arm using the next 4 sc stitches, sc 8, sc 4 attaching the 2nd arm, sc 4 (24)
R 14: {sc 2, dec} repeat 6 times (18)
*The next rounds will be continuing on to the head of the bear
Head
R 15: inc in each stitch around (36)
R 16: {sc 8, inc} repeat 4 times (40)
R 17-21: Sc 40 around (40)
I attached safety eyes between rounds 19-20, 6 stitches apart. Suggestion only feel free to use your own personal preference on postioning.
R 22: {sc 3, dec} repeat 8 times (32)
R 23: {sc 2, dec} repeat 8 times (24)
R 24: {sc 1, dec} repeat 8 times (18)
R 25: dec x9 (9)
Fasten Off/ Sew Remaining Loops Closed
Muzzle
R 1: 8 sc into MR (8)
R 2: inc in each stitch (16)
R 3: sc 16 (16)
Fasten Off
Center the muzzle on the front of head, towards the bottom. I sew on between rounds 15-20.
Embroider Nose
Ears x2
R 1: 6sc into MR (6)
R 2: inc in each stitch (12)
R 3: sc 12 (12)
Fold and sc across 4 stiches to close the ear
* I sewed the ears on the side of head using rows 21-24 as guide 5 stitches away from the eyes. This may vary for you depending on eye choice and tension.
Scarf
Row 1: ch 32.
Row 2: ch1 turn, sc 32
You can slip stitch the 2 ends of the scarf together around the bears neck or fasten off and sew the ends together.
Chain length will vary depending on yarn and hook size
Face Shaping
Insert yarn from behind on bottom of eye next to muzzle.
Insert in to the bear at the top of the eye exiting out at the top of the second eye on the other side pull slightly to indent the face a little pulling eye in gently.
Insert into body at the bottom of the second eye exiting again pulling gently to shape the eyes.
Tie off

