


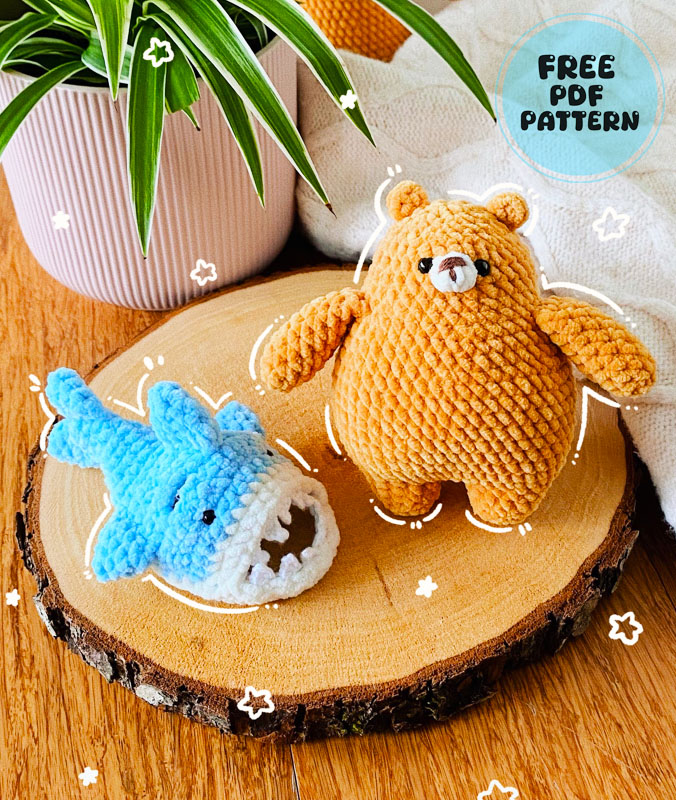
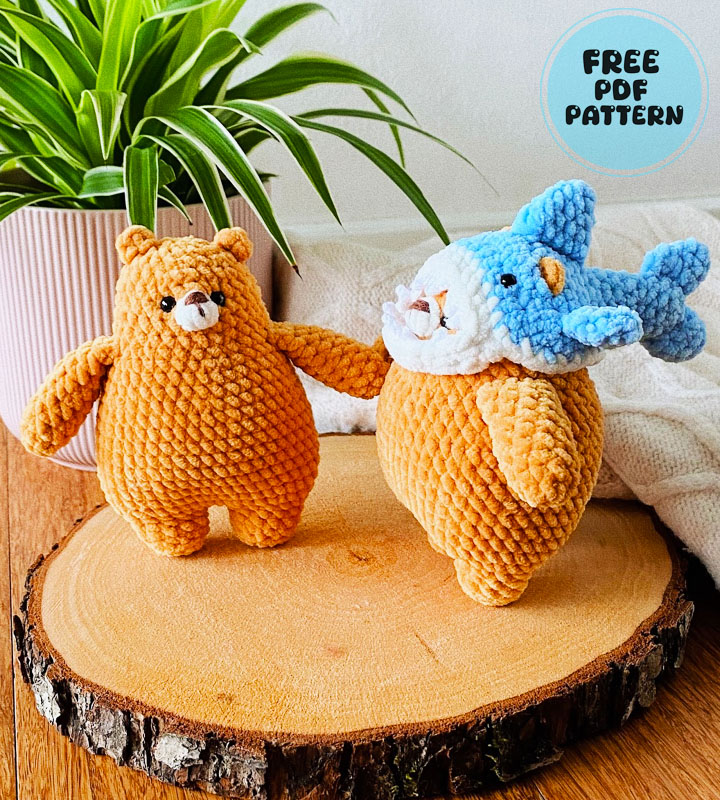
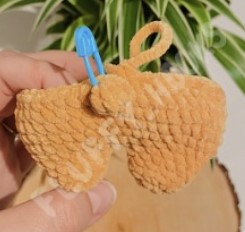
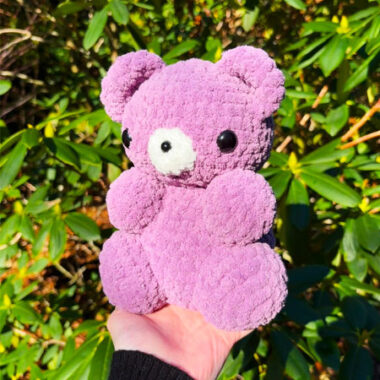
A gorgeous crochet teddy bear with a shark hat designed by fluffy_hooks! You must have noticed the changes in amigurumi patterns lately. However, it must be quite difficult to find such a creative and free crochet pattern. Today, we will make a crochet teddy bear with a shark hat. Since the stages of making the toy are shared in detail, your work will be much easier.
Bear with Shark Hat Crochet PDF Pattern
The toy generally consists of two parts. First, you will learn how to make the teddy bear. Then, you will learn how to crochet the shark hat step by step. Now, if you are ready, let’s take a look at the details of the pattern.
Designer: fluffy_hooks
MATERIALS
Feel free to experiment with different yarn types and colours! 🙂
Here are the materials I used:
• fine chenille yarn (size 4) > Hobbii Tucan Fine in colours: mustard and cream
• brown cotton/acrylic yarn for embroidering the nose
• 3.5mm crochet hook
• 6mm safety eyes
• stuffing
• stitch marker
• sewing needle
• scissors
For the shark hat:
• fine chenille yarn (size 4) in blue and cream & a 3.5mm hook
• super fine white cotton yarn for the teeth & a 2mm hook
• 5mm safety eyes
ABBREVIATIONS
R – round
CH – chain
MR – magic ring
SC – single crochet
SLST – slip stitch
HDC – half double crochet
INC – increase
DEC – invisible decrease
BLO – back loops only
FO – fasten off
ST(S) – stitch(es)
BOB – bobble stitch (6 loops on the hook]
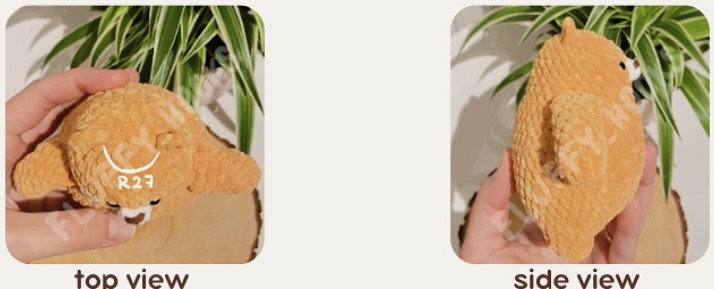
BODY in mustard
We will start by making the legs. *I mark the 1st st of the round*
FIRST LEG
R1: 6sc in MR (6)
R2: 6inc (12)
R3: BLO sc around (12)
R4: sc around (12)
FO, cut the yarn, no need to leave a tail.
SECOND LEG
R1: 6sc in MR (6)
R2: 6inc (12)
R3: BLO sc around (12)
R4: sc around, ch2 at the end of the round (14)
R5: Connect the 1st leg with a sc – make the sc into any st of the 1st leg.

Then continue the round:
11SC around the 1st leg, 2sc into the ch2,
12sc around the 2nd leg, 2sc into the ch2 (28)
R6: (3sc, inc) repeat 7 times (35)
R7: (2sc, inc) repeat 11 times, 2sc (46)
Stuff the legs and continue stuffing as you go.
Make the bear as chubby as you wish!
depending on your tension the BOBS may be off- centred, feel free to move them left or right to centre them with the legs.
BODY CONTINUATION in mustard
The part written in dark brown should be crocheted in cream
– this will be the bear’s snout
R8: (22sc, inc) repeat 2 times (48)
R9: sc around (48)
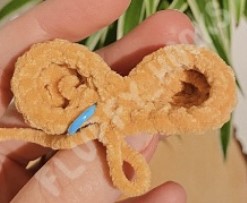
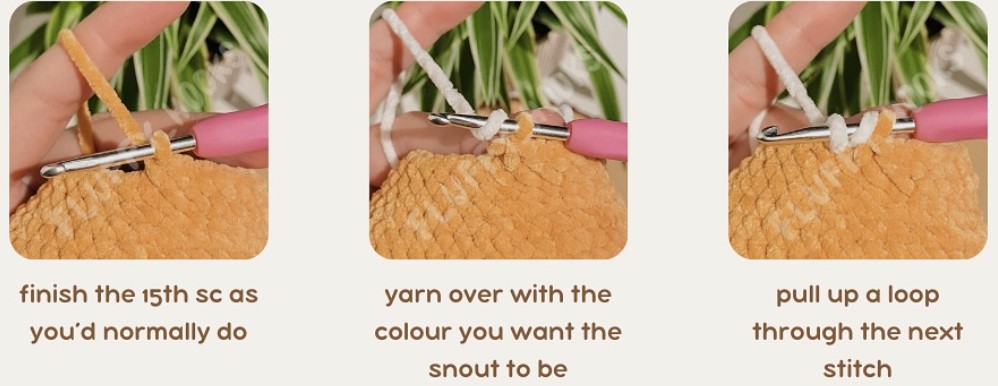
R10: 46sc, BOB, sc (48)
R11-15: Sc around (48) *5 rounds*
R16: (6sc, dec) repeat 6 times (42)
R17-18: sc around (42) *2 rounds*
R19: (5sc, dec) repeat 6 times (36)
R20: [4sc, dec) repeat 6 times (30)
R21: sc around (30)
R22: 15sc, dec, 13SC (29)
R23:15SC, BOB, 13SC (29)
clean BOB tutorial on the next page
R24: 15sc, inc, 13SC (30)
R25: (3sc, dec) repeat 6 times (24)
Insert the eyes between R23-24 on either side of the snout.
R26: (2sc, dec]x6 (18)
R27: (sc, dec) repeat 6 times (12)
R28: 6dec (6)
FO, sew the hole closed, tuck away the tail.

Clean bobble stitch with colour change
Then you need to do the following.

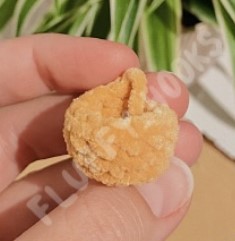
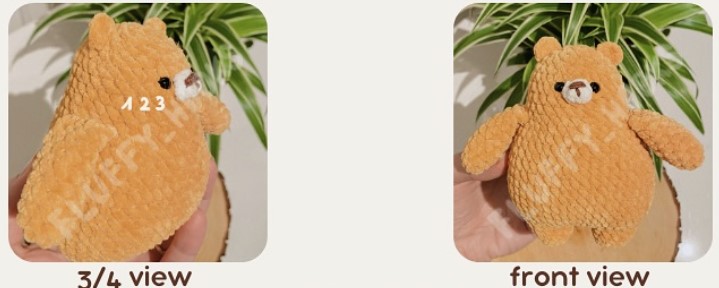
ARMS in mustard
(make 2)
R1: 6sc in MR (6)
R2: (sc, inc) repeat 3 times (9)
Make sure to stuff as you go, but don’t overstuff.
R3-9: sc around (9) *7 rounds*
R10: fold in half and 4sc across both sides to close the hole (4)
Fold the arm in half.
*I like to skip the last st of R9 to achieve the 4sc.*
FO, cut the yarn, leave a long tail for sewing.
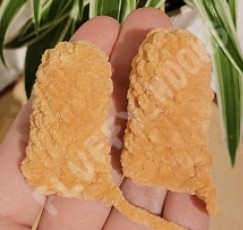
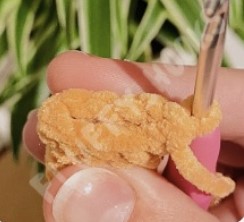
EARS in mustard
(make 2)
R1: 3sc in MR (3)
Close the MR to form a semi-circle.
FO, leave a tail for sewing.
*If you’re using a bigger sized yarn, or would like to have slightly bigger ears, try this instead:
R1: 3hdc in MR (3)
Close the MR to form a semi-circle.
FO, leave a tail for sewing.

ASSEMBLY
EARS
Sew the ears on top of the head: top of the ear should land above R27. bottom of the ear should land above R25. If you’d like to make the hat, do that before attaching the ears and use the hat as a guide for ear placement!
ARMS
Sew the arms on the sides of the bear’s body, between R19 and R20, 3sts away from the eyes.
FACE
Now you can embroider a little nose to give the bear some character!
Feel free to experiment with other details!
As you make the hat, make sure it fits nicely around the head and adjust your tension accordingly if needed!
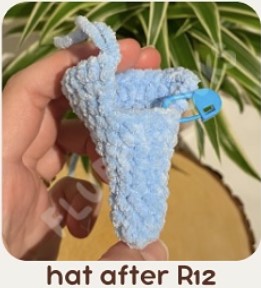
SHARK HAT in blue
R1: 6sc in MR (6)
R2: (sc, inc) repeat 3 times (9)
R3-5: sc around (9) *3 rounds*
R6: (inc, 2sc) repeat 3 times (12)
R7: sc around (12)
R8: (inc, 3sc) repeat 3 times (15)
R9: (inc, 4sc) repeat 3 times (18)
R10: sc around, ch1, turn (18)
From now on we will be working in turns. Do not crochet into the turning chain.
R11: (inc, 3sc) repeat 3 times, ch1, turn (15)
R12: (inc, 4sc) repeat 3 times, ch1, turn (18)
R13: (inc, 5sc) repeat 3 times, ch1, turn (21)
R14: inc, 4sc, ch4, skip 3sts, 2sc, inc, 2sc, ch4, skip 3sts, 4sc, inc, ch1, turn (26)
R15: dec, 4SC, 4sc in the ch, 6sc, 4sc in the ch, 4sc, dec, ch1, turn (24)
R16: (sc, dec, sc) repeat 6 times, ch1, turn (18)
R17: (dec, 4sc) repeat 3 times (15)
Change colour to cream, ch1, turn.
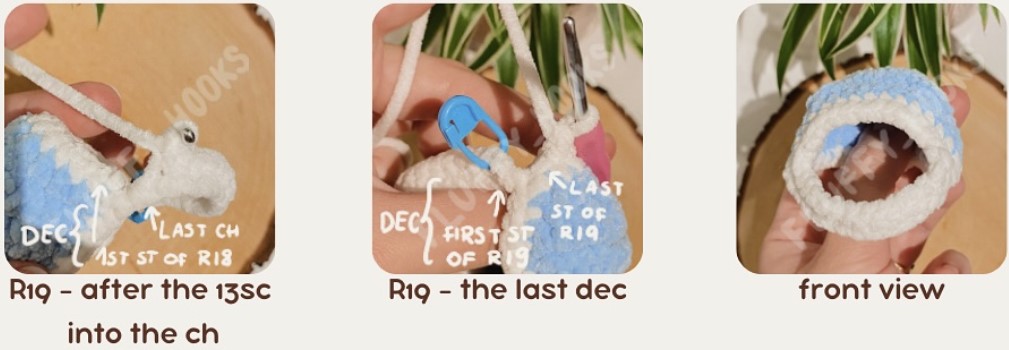
R18: working along the top: 15sc, 9sc on the side, 6sc on the back, 9sc on the side, ch 14, skip 15sts, sc, ch1, turn
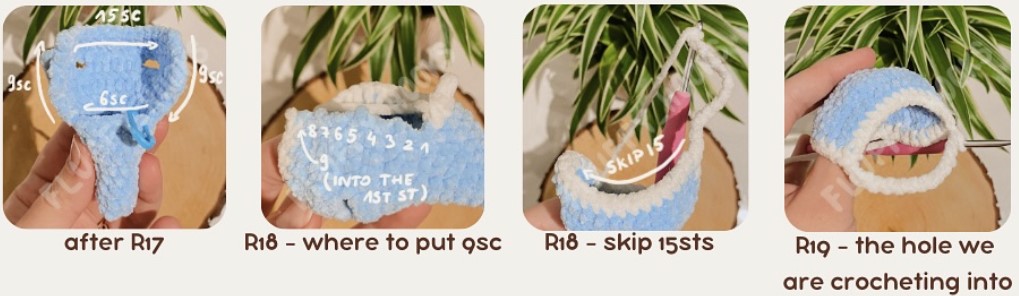
R19: working on the inside of the hole created between the 15sc and the chain: 13sc into the ch, dec, 13sc into the top, dec using the last and the first st of this round, slst into the next st
FO, tuck away all tails, don’t stuff.
TOP FIN in blue
R1: 3sc in MR (3)
R2: 2inc (6)
R3: (sc, inc) repeat 3 times (9)
R4: (2sc, inc) repeat 3 times (12)
R5: dec, 4sc, 2hdc, 4sc (11)
Slst, FO, leave a tail for sewing. Don’t stuff.
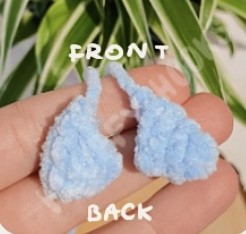
SIDE FIN (make 2) in blue
R1: 3sc in MR (3)
R2: 3inc (6)
R3: (sc, inc) repeat 3 times (9)
R4: sc around (9)
Slst, FO, leave a tail for sewing. Don’t stuff.

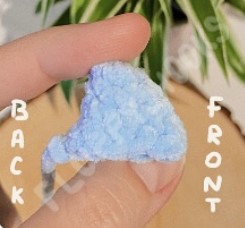
BACK FIN (make 2) in blue
R1: 3sc in MR (3)
R2: 2inc (6)
R3: (sc, inc) repeat 3 times (9)
R4: inc, 2sc, 2dec, 2sc (8)
Slst, FO, leave a tail for sewing. Don’t stuff.
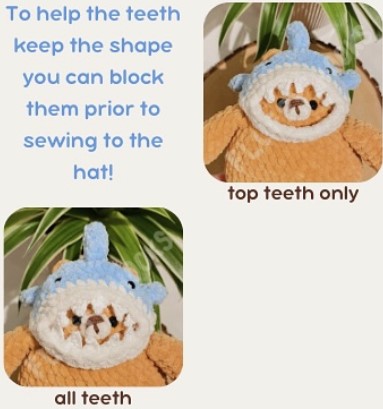
TEETH using a super fine yarn, in white
Make sure the chain you’ll make fits nicely from one corner of the mouth to the other. If you want to adjust the length of the initial chain, you can do that in sets of 3sts, so ch23, ch26, ch29 and so on.
ch 20, starting at the 2nd ch from the hook, Slst, sc, hdc, dc, skip 2ch, Slst. (ch5, starting at the 2nd ch from the hook, Slst, sc, hdc, dc, skip 2ch, slst) repeat 4 times

FO, leave a tail to sew to the hat. You could also use fabric glue to attach the teeth to the hat.
Depending on your liking you can place the teeth either on the top or bottom lip of the shark. You can also make two identical teeth chains and attach them to both shark lips.
ATTATCH THE TEETH ON THE INSIDE OF THE HAT, TO HIDE ALL THE SEAMS.
SEWING HAT PIECES
TOP FIN: back of the fin between R10 & R11, front of the fin between R14 & R15, centred between the ear holes
SIDE FINS: back of the fins between R10 & R11, front of the fins between R14 & R15, on either side of the body
BACK FINS: back of the fins into the centre of R1, front of the fins between R3 & R4, attach the fins vertically, just like the top fin

Add safety eyes to the shark, place them between R17 &R18 (one R above the white row), about 7sts apart. You can adjust this to your liking!

