


Dear friends.
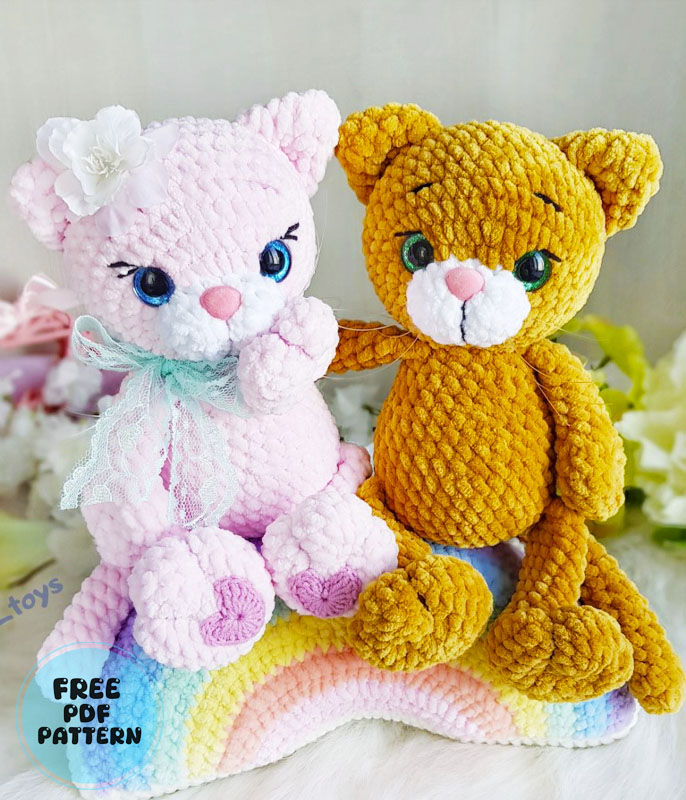
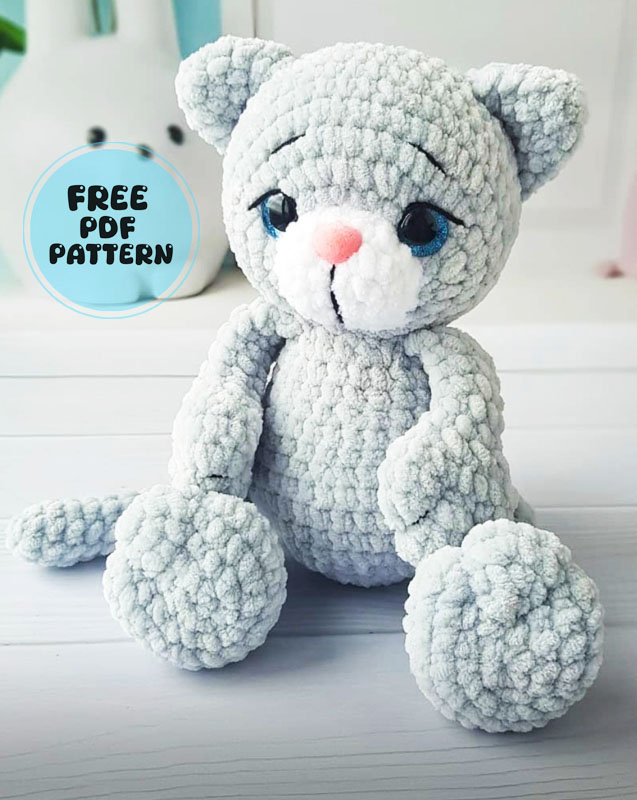
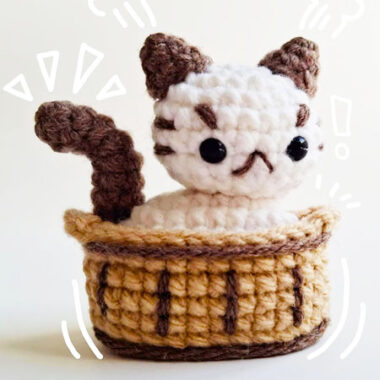
How are you today. Today I am sharing a wonderful cat amigurumi pattern. A beautiful pattern made using velvet yarn. I hope you will like it. Amigurumi cat patterns are a very sought after and highly appreciated type of amigurumi. Today I am sharing this beautiful and cute amigurumi crochet cat patterns. Have you crocheted the cat amigurumi pattern before? If your answer is no, let me first say this. Cat amigurumi will be a little difficult to embroider with crochet. Generally, you will see advanced amigurumi patterns.
Big Plush Cat Sully Crochet Toy Pattern
Therefore, I recommend you to develop yourself in easier amigurumi patterns first. Amigurumi kitties are now usually crocheted using velvet yarn. Other types of rope are no longer in demand. It is prepared to be plush. In fact, it is easy to work with crochet. It also grows in size. I hope you like it. Now let’s crochet the cat amigurumi step by step.
Designer: chirka_toys
MATERIALS
1. Yarn Himalaya Dolphin baby or similar;
2. Hook 3.5 mm;
3. The eyes on the mount are shiny 16 mm;
4. Muzzle on a secure mount 15×13 mm;
5. Yarnart Jeans yarn for the design of the face and legs;
6. Scissors, sewing needle;
7. Holofiber filler;
8. Mustache fishing line (optional).
Abbreviations
MR – Amigurumi Magic ring
sc : Single Crochet
inc : Increase
dec : Decrease
st: Stitch
sl-st : Slip Stitch
ch : Chain
UPPER LEGS (2 parts)
1. 6MR
2. 6inc (12)
3. (1sc, inc)*6 (18)
4-5. 18sc (18)
6. 9dec (9) you can fill the lower part of the leg a little, but not necessarily
7-12. 9sc (9)
Fold in half and close with 4 sc. Cut the yarn, fasten off.
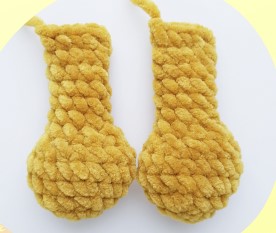
On the lower part of the leg with thin yarn (YarnArt jeans), it is necessary to select the toes. To do this, we make 2 tight stitches, passing the needle through the leg.

LOWER LEGS (2 parts)
1. 5 ch, start to crochet in the second loop from the hook, inc, 2sc, 3sc to the outer ch, 3sc (10)
2. 2inc, 2sc, 3inc, 2sc, inc (16)
3. (1sc, inc)*2, 2sc, (1sc, inc)*3, 3sc, inc (22)
4. (2sc, inc)*2, 2sc, (2sc, inc)*3, 4sc, inc (28)
5. 28sc (28)
6. 8sc, 8dec, 4sc (20)
7. 6sc, 6dec, 2sc (14)
8. 6sc, 3dec, 2sc (11)
9-15. 11sc (11) fill the lower part of the leg with a little filler

16. 10sc, fold in half and close with 5sc. Cut the yarn and fasten off. On the lower part of the leg with thin yarn (YarnArt jeans), it is necessary to select the toes.
To do this, we make 2 tight stitches, passing the needle through the foot.

TAIL
1. 8MR
2-21. 8sc (8)
Fold in half and close with 4sc. Cut the yarn, fasten.

EARS (2 parts)
1. 6MR
2. (1sc, inc)*3 (9)
3. (2sc, inc)*3 (12)
4. (3sc, inc)*3 (15)
5. (4sc, inc)*3 (18)
Cut the yarn, leaving the long end for sewing the ear.

Body
1. 6MR
2. 6inc (12)
3. (1sc, inc)*6 (18)
4. (2sc, inc)*6 (24)
5. (3sc, inc)*6 (30)
6. (4sc, inc)*6 (36)
7. In this row we sew the lower legs and tail. The marker runs along the back. 5sc, 5sc with leg, 12 sc, 5sc with leg, 5sc, 4sc with tail (36)
8-9. 36sc (36)
10. (4sc, dec)*6 (30)
11-12. 30sc (30)
13. (3sc, dec)*6 (24)
14-15. 24sc (24)
16. (2sc, dec)*6 (18)
17. In this row we sew the upper legs. 4sc, 4sc with leg, 4sc, 4sc with leg, 2sc (18)
Slst, cut the yarn, leaving a long end for sewing on the head.

Head
We start with white.
1. 5 ch, in the second loop from the hook, inc, 2sc, 3sc in the last ch, 3sc (10)
2. 2inc, 2sc, 3inc, 2sc, inc (16)
3. 16 sc (16)
4. 16 slst (16) change the yarn to the main color.
5. 16inc (32)
6. (2sc, inc)*7, 11sc (39)
7. 4sc, (5sc, inc)*3, 17sc (42)
8-13. 42sc (42)
Insert the muzzle between the 2nd and 3rd rows.
The photo shows the place where we insert the muzzle.
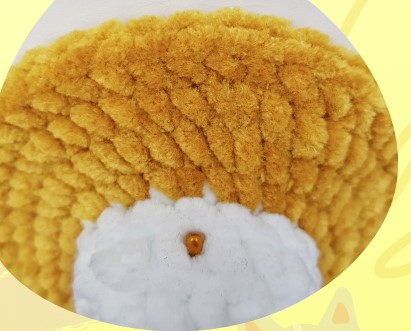
Insert eyes 16mm between the 5th and 6th rows.
Places of insertion are marked in the photo.
The distance between the marks is 10sc.

14. (5sc, dec)*6 (36)
15. (4sc, dec)*6 (30)
16. (3sc, dec)*6 (24)
17. (2sc, dec)*6 (18)
18. (1sc, dec)*6 (12)
19. 6dec (6)
Slst, cut the yarn, pull off the hole with a needle.

ASSEMBLY
Sew the ears on at the level of rows 12 and 13 in the form of an arc. The distance between the ears is 7-8 sc.
Using YarnArt Jeans yarn, embroider the eyebrows, eyelids above the eyes, divide the white muzzle into two cheeks and you can make a small tightening by pulling the point above the nose to the bottom point of the mouth.
Sew the head to the body.

CONGRATULATIONS! Your Kitty is ready!

