


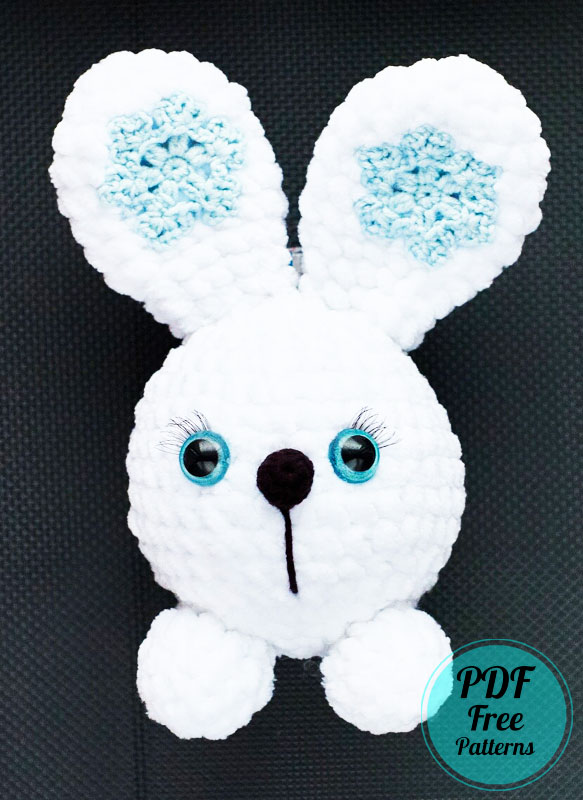
Hello my dears. Today I want to share a wonderful bunny pattern especially for winter. Amigurumi bunny is made using velvet rope. Also, the crochet bunny pattern has wonderful snowflake figures on its ears. I think it could be a great decoration material for Christmas. If you want to examine the free amigurumi patterns I shared before, you can browse all the free amigurumi patterns in the categories section.
Snowflake Bunny Rosie Crochet Pattern
I was honestly shocked that the bunny’s ears were made in the shape of a snowflake. I’ve been making amigurumi toys for years, but this is the first time I’ve seen a design like this. It’s also important to remember that the snowflakes are unique, but since a symmetrical design was preferred here, the same snowflake design was used.
Designer: natascha.zayceva
Materials
1. Yarn.
– Super bulky/Super chunky velvet yarn YarnArt Dolce (100% micro polyester, 100g/120m): white 741 (main – 1/3 a skein);
– Sport weight/4 ply yarn YarnArt Jeans (50g/160m, cotton 55%, acrylic 45%): blue 76 for snowflakes; black 53 for nose.
2. Hook. I used 3,5 mm for plush yarn and 2,0 mm for YarnArt Jeans.
3. Polyester toy filling.
4. Eyes. Safety colored eyes size 14 mm.
5. False eyelashes and glue (optional).
6. Scissors, needle, stitch markers.
TOY SIZE -17 cm / 6,9″ with ears
Abbreviations
MR – magic ring
ch – chain
sl st – slip stitch
sc – single crochet
dc – double crochet
2dc cluster – crochet 2dc in one stitch with a common top
inc – increase (2 sc in one stitch)
dec – decrease (2 sc together)
* – repeat**

Eyes
You can make colored eyes by yourself using colorless (transparent) eyes and felt. I made the eyes for this bunny.

Take felt of a suitable color and cut out 2 circles for the eyes. Make a hole in the middle for the leg.

Also at this stage, you can make the eyes glare. Cover the inner surface of the eyes with a thin layer of colorless varnish. And, until the varnish layer is dry, sprinkle it with sparkles.

Now put on felt circles and your eyes are ready to use.

Head and Body
Crochet with velvet yarn.
1r: ch2, 6 sc in the second chain from the hook (6)
2r: inc*6 (12)
3r: (sc, inc)*6 (18)
4r: (2 sc, inc)*6 (24)
5r: (3 sc, inc)*6 (30)
6r: (4 sc, inc)*6 (36)
7-11r: 5 rounds of 36 sc (36)
12r: (4 sc, dec)*6 (30)
13r: 30 sc (30)
14r: (3 sc, dec)*6 (24)
Insert eyes at this stage. If you are making a bunny with false eyelashes, cut off two identical pieces (about 1 cm) and stick on the inner side of the eye. After that, between rounds 8 and 9, at a distance of 5 sc, place the eyes (see photo) and put on the plugs.
Stuff the head.
15r: (2 sc, dec)*6 (18)
16r: (sc, dec)*6 (12)
17r: dec*6 (6)
Cut the yarn and tighten the hole. Fasten off and weave in the yarn ends.

Ears
Make 2 with velvet yarn. Do not stuff.
1r: ch2, 6 sc in the second chain from the hook (6)
2r: inc*6 (12)
3r: (sc, inc)*6 (18)
4-8r: 5 rounds of 18 sc (18)
9r: (4 sc, dec)*3 (15)
10r: (3 sc, dec)*3 (12)
11-12r: 2 rounds of 12 sc (12)
Leave a long tail for sewing.

Snow Flake
Crochet 2 pieces with blue 4ply yarn YarnArt Jeans.

1r: 6 sc in MR (6), fasten off with sl st
2r: ch3, dc into the first stitch, ch3 and sc into the top of dc, ch4 and sc into the same top, ch3 and sc into the same top, ch3, (2dc cluster into the next stitch, ch3 and sc into the top of dc, ch4 and sc into the same top, ch3 and sc into the same top, ch3)*5, but crochet ch2 at the end and fasten off with sl st
Leave a long tail for sewing.

Nose
With black 4ply yarn YarnArt Jeans.
lr: 6 sc in MR (6)
2r: (sc, inc)*3 (9)
3r: 9 sc (9)
4r: (sc, dec)*3 (6)
Leave a yarn tail for sewing. Add a little fiberfill.

Legs
Make 2 with velvet yarn.
lr: ch2, 6 sc in the second chain from the hook (6)
2r: inc*6 (12)
3-4r: 2 rounds of 12 sc (12)
5r: dec*6 (6)
Leave a yarn tail for sew ing. Stuff the legs tightly.

Tail
With velvet yarn.
lr: ch2, 6 sc in the second chain from the hook (6)
2r: inc*6 (12)
3r: (3 sc, inc)*3 (15)
4-5r: 15 sc (15)
6r: (3 sc, dec)*3 (12)
Leave a yarn tail for sewing. Stuff the tail tightly.

Assembly
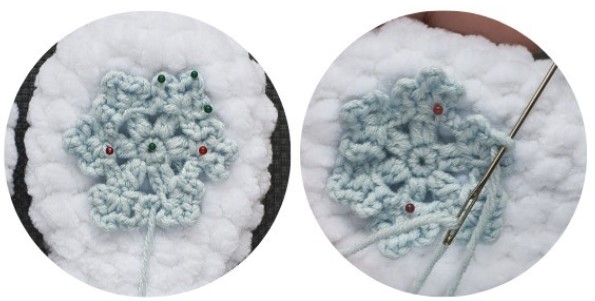
Sew the snowflakes to the ears. Fix them with pins below round 3. And sew through chains at the top and in the center (see photo – marked with green pins).
Sew the ears on the very top of the head, close to each other through front loops of the last round of the ears. Make sure the snowflakes are symmetrical.

After sewing on all the pieces, fix the ends, cut them off and hide inside.

Attach the nose with a pin to round 9, the yarn tail for sewing must be at the bottom. Embroider a stripe 4 rounds down the nose with it. Sew on the nose through the front loops of the last round.

Sew on the legs after round 13 in a circle through front loops of the last round, at a distance of about 2 cm from each other.

Sew on the tail between rounds 10 and 15 in a circle through front loops of the last round.

After sewing on all the pieces, fix the ends, cut them off and hide inside.


