


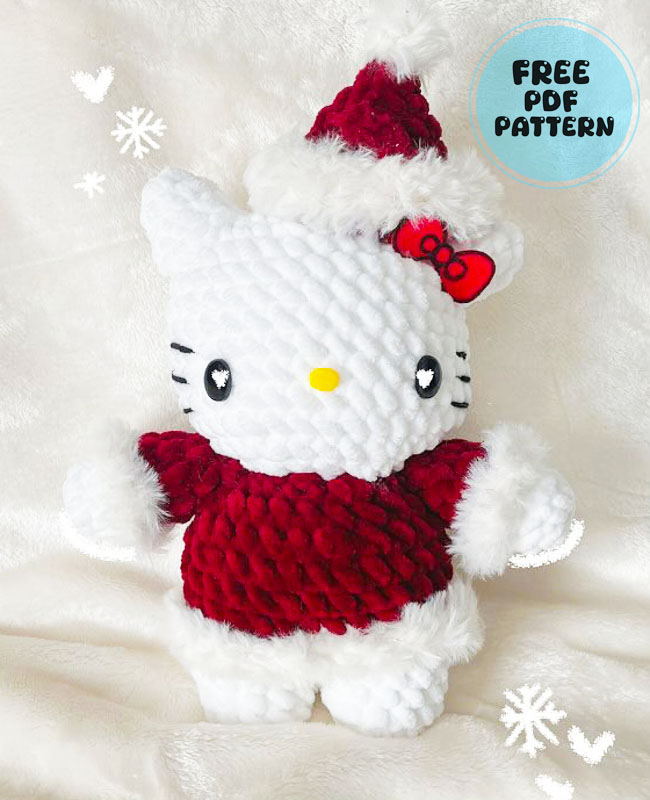
I have shared different crochet designs of Hello Kitty amigurumi toys with you, but today I will introduce you to a Hello Kitty amigurumi toy designed for Christmas. The amigurumi toy is made using red and white yarn. We can see that chenille yarn and a type of furry yarn were used in the crochet cat. This furry yarn was used especially in the part where the cat amigurumi toy has hands and in the Santa hat.
Hello Kitty with Christmas Costume Crochet Pattern
The amigurumi face design has lines identified with the Hello Kitty character. The cat’s whiskers and the positioning of the eyes are exactly like the Hello Kitty character.
Designer: xochitlmochi_crochet
Before starting .
• This pattern is written in continuous rounds no need to sl st and ch 1 at the end of each round
• Please do not mass produce
• This pattern is worked from top to bottom
Materials
• Size 6 yarn in the colors pink & white (optional) fluffy yarn in white or just chenile white yarn
• Crochet hook appropriate for your yarn
• Polyfil stuffing
• Stitch marker
• Tapestry needle
• Scissors
• Felt for the eyes and nose or safety eyes/nose
• pompom (optional you can make this with acrylic yarn there are tutorials on youtube)
Abbreviations
sc: single crochet
Mr: magic ring
dc: double crochet
inc: increase
dec: decrease
CH: chain
R: row/ round
FO: fasten off
BLO: sc into the back loop only
FLO: sc into the front loop only
BBL: bobble stitch
SL ST: slip stitch
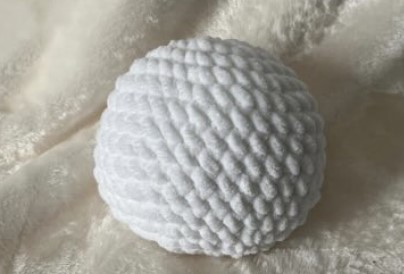
Head
in white
R1: 7sc in Mr (7)
R2: incx 7 (14)
R3: (sc,inc) x7 (21)
R4: (2sc,inc)x7 (28)
R5: (3sc,inc) x7 (35)
R6-R12: sc around (7 rounds) Place eyes between R10/R11 8 stitches between the eyes and nose in the middle.
R13: (3sc,dec) x7 (28)
Start stuffing
R14: (2sc,dec) x7 (21)
R15: (sc,dec) x7 (14)
R16: dec x7 (7)
FO sew closed
Legs / Body
starting in white
Leg one
R1: 6sc in Mr (6)
R2: incx 6 (12)
R3-R5: sc around (12) (3 rounds)
FO for first leg repeat R1-R5 for the 2nd leg. Attach the 2nd leg to the 1st leg with a sc (that sc will count as the first sc for the next row)
R6: 10sc, 2inc in first leg 2inc, 10sc in second leg (28)
R7: sc around (28)
R8: switch to red and sc in BLO (28) (place a stitch marker in the front loops of the first and last stitch of that row you will be crocheting into those loops at the end)
R9:-R10: sc around (28) (2 rounds)

Body Continued
R11:(5sc, dec) x4 (24)
R12: sc around (24)
R13: (4sc, dec) x4 (20)
R14: (3sc, dec) x4 (16)
FO leave a long tail for sewing and stuff

Arms x2
starting in white
R1: 9sc in Mr (9)
R2-R3 sc around (9) (2 rounds)
R4: switch to red and in BLO sc around (9) place stitch markers in the front loops of the first and last stitch of the row we will be crocheting into these at the end.

R5-R7: sc around (9) (3 rounds) (optional) stuff lightly and sew arms closed.
FO leave a tail for sewing.

Ears x2
in white
R1: 5sc in Mr (5)
R2: (sc,inc) x2, sc (7)
R3: (2sc,inc)x2, sc (9)
R4: (3sc,inc)x2, sc (11)
FO leave a tail for sewing
Fluffy Lining
With your fluffy yarn make a slip knot flip the arms and body upside down. insert your hook into the stitch markers we placed on the front loops of the body and arms and sc around FO and weave in the ends. (see photos on previous page for help)
Santa Hat
starting in red
R1: 4sc in Mr (4)
R2: incx4 (8)
R3: (sc,inc)x4 (12)
R4: (2sc,inc) x4 (16)
R5: sc around (16)
R6: (3sc,inc) x4 (20)
R7: (4sc,inc) x4 (24)
R8: switch to the fluffy yarn and sc around (24)
R9: sc around (24) (optional stuff hat)
FO weave in ends. with fluffy yarn make a slip knot, insert hook into the top of the hat and make a BBL stitch.
Assembly
• sew head onto body
• sew arms between head and body
• sew ears onto R3/R4 of head
• place hat next to right ear you can sew it on or just leave sitting on top
• (if not already added) place safety eyes and nose on head or cut out felt details like photo reference. Lastly embroider whiskers on the side of the face. Dont forget to make the bow with felt and place on the right ear under the hat

