


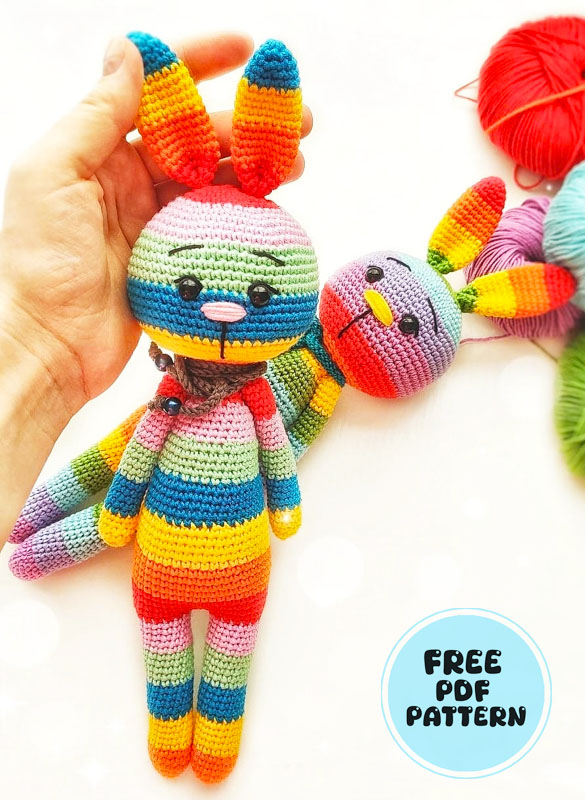
I will share with you the bunny amigurumi pattern designed by shema_toys and featuring a striped color scheme. To make such toys, you will need to use the extra yarns you have, but if you want to make this design in particular, let’s take a look at the materials. The designer used Gazzal Baby Cotton yarn in the making of the toy. It is recommended that you use a 2mm crochet hook to make the toy.
Bonnie the Rainbow Bunny Crochet Pattern
The finished size of the toy is approximately 28cm. However, if you wish, you can shorten this size a little because the legs and body of the toy seem too long. Now, if you are ready, let’s take a look at the details of the pattern.
Designer: Christina
Necessary materials:
Gazzal Baby Cotton yarn (50 g / 165 m)
Crochet Hook size # 2
Mouline thread for decoration
Screw eyes (for my toys I use 10 and 8 mm)
Needle, scissors, marker (if using)
Filler
Abbreviations
sc : Single Crochet
inc : Increase
dec : Decrease
tr : Triple Crochet/ Treble Crochet
st: Stitch
dc : Double Crochet
hdc: Half Double Crochet
sl-st : Slip Stitch
ch : Chain
Knitting starts at the bottom. Legs and body are knitted in one piece.
You define the color as you wish, as well as the number of rows for each color.
I had 5 rows for each color, except for the legs, for the first color I make 7 rows.
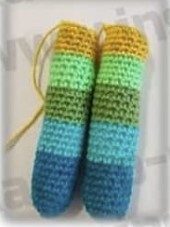
We’ll start by crocheting the first leg with gradual increases. We’ll change colors several times as we go. After shaping and lengthening, we’ll end on the side, add a few offset stitches, then cut the yarn. We’ll crochet the second leg the same way but won’t cut the yarn this time.
First legs
1 Row: 6 sc in MR (6)
2 Row: (1 sc, inc) repeat 3 timess (9)
3 Row: (2 sc, inc) repeat 3 timess (12)
4 Row: (3 sc, inc) repeat 3 timess (15)
5-7 Rows: 15 sc
Change the color:
8-12 Row: 15 sc
Change the color:
13-17 Row: 15 sc
Change the color:
18-22 Row: 15 sc
Change the color:
23-27 Row: 15 sc
Since the legs will be connected, the crocheting needs to end on the side.
Make the offset loops +3, not forgetting to change the color, 1 slst, cut the yarn.
The second leg is crocheted in the same way, only do not cut the yarn.
Change the color:
28 Row: Make an offset loops so that the connection of the legs is on the side, + 12 sc
Connect the legs with 3 ch, we crochet the connecting sc in the same loop where it is crocheted slst.
15 sc on first leg, 3 sc on one side of the chain, 3 sc on second leg (33)
29 Row: sc from the previous Row, + 3 sc on the second side of the chain, so we go to the number of loops equal to 36 (36)
30 Row: (5 sc, inc) repeat 6 times (42)
31-32 Row: 42 sc
Change the color:
33-37 Row: 42 sc
Change the color:
38-42 Row: 42 sc
Change the color:
43 Row: (5 sc, dec)* 6 time (36)
44-47 Row: 36 sc
Change the color:
48 Row: (4 sc, dec) repeat 6 times (30)
49-52 Row: 30 sc
Change the color:
53 Row: (3 sc, dec)* 6 time (24)
54-57 Row: 24 sc
Change the color:
58 Row: (2 sc, dec)* 6 time (18)
59-62 Row: 18 sc
Cut the thread.

We’ll begin each arm with a small base and increase a bit. We’ll change colors at intervals to create a striped look. We’ll only fill about two-thirds with stuffing. Then we’ll shape the end, decrease slightly, and fasten off to prepare them for attaching later.
Arms (2 parts)
1 Row: 5 sc in MR (5)
2 Row: 5 inc (10)
3-5 Row: 10 sc
Change the color:
6-10 Row: 10 sc
Change the color:
11-15 Row: 10 sc
Change the color:
16-20 Row: 10 sc
Change the color:
21-24 Row: 10 sc
We fill only 2/3 of the arms.
25 Row: (3 sc, dec)* 2 times (8)
Fasten off, cut the yarn.
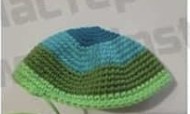
We’ll build the head from a small circle, increasing each round. We’ll change yarn colors several times for a striped effect. We’ll place safety eyes between the color sections. Then we’ll stuff the head, start decreasing, and finally close the top to finish the shape.
Head
1 Row: 6 sc in MR (6)
2 Row: 6 inc (12)
3 Row: (1 sc, inc) repeat 6 times (18)
4 Row: (2 sc, inc) repeat 6 times (24)
5 Row: (3 sc, inc) repeat 6 times (30)
Change the color:
6 Row: (4 sc, inc) repeat 6 times (36)
7 Row: (5 sc, inc) repeat 6 times (42)
8 Row: (6 sc, inc) repeat 6 times (48)
9 Row: (7 sc, inc) repeat 6 times (54)
10 Row: (8 sc, inc) repeat 6 times (60)
Change the color:
11-15 Row: 60 sc
Change the color:
16-20 Row: 60 sc
If you use safety eyes, then they should be inserted at the transition of colors (15-16 Rows from the crown) at a distance of 5 sc from each other, also this distance can vary, closer to each other or further.
Change the color:
21 Row: (8 sc, dec) repeat 6 times (54)
22 Row: 54 sc
23 Row: (7 sc, dec) repeat 6 times (48)
24 Row: (6 sc, dec) repeat 6 times (42)
25 Row: (5 sc, dec) repeat 6 times (36)
Change the color
26 Row: (4 sc, dec) repeat 6 times (30)
27 Row: (3 sc, dec) repeat 6 times (24)
28 Row: (2 sc, dec) repeat 6 times (18)
29 Row: 18 sc
Fasten off, leaving the yarn (or cut and sew the details in any color you like).
We’ll crochet the ears in a rounded shape, increasing at first. We’ll change colors a few times for detail, then start decreasing. We’ll leave a long yarn tail so we can sew them to the head. Their position helps shape the expression of the face.
Ears (2 parts)
1 Row: 6 sc in MR (6)
2 Row: (1 sc, inc) repeat 6 times (9)
3 Row: (2 sc, inc) repeat 6 times (12)
4 Row: 12 sc
5 Row: (2 sc, inc) repeat 4 timess (16)
Change the color:
6-10 Row: 16 sc
Change the color:
11-15 Row: 16 sc
Change the color:
16 Row: (2 sc, dec) repeat 4 timess (12)
17-18 Row: 12 sc
We leave the yarn in order to sew the ears to the head.
We’ll sew the ears to the head, then use black yarn to embroider the mouth, eyebrows, and eyelids. If we want, we can also embroider small white stitches near the eyes to create a highlight. The face gives the figure personality and charm.
Face design:
Sew on ears, embroider mouth, eyebrows, upper eyelid with black yarn, if desired, embroider whites of eyes with white yarn.
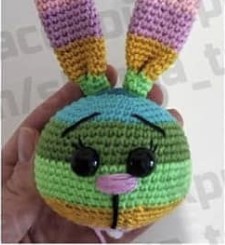
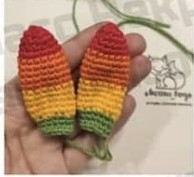
We’ll embroider the nose with short stitches in any color we like. Placement can follow a reference photo or our own preference. This tiny detail will help complete the face.
Nose
Embroider with stitches, for example, as in the photo, any color.
Sew on the details.


