


Obi-Wan Kenobi is one of the most iconic Jedi in the Star Wars universe. A powerful warrior and wise teacher, Obi-Wan was Anakin Skywalker’s trainer and friend. After Anakin’s transition to the dark side, Obi-Wan decides to train Luke Skywalker and becomes an important part of the fight against the Empire. He is a sincere, loyal and brave character. Now we will make a crochet toy of this character. Actually, I don’t need to give this information because the friends who came here for this toy should probably know enough.
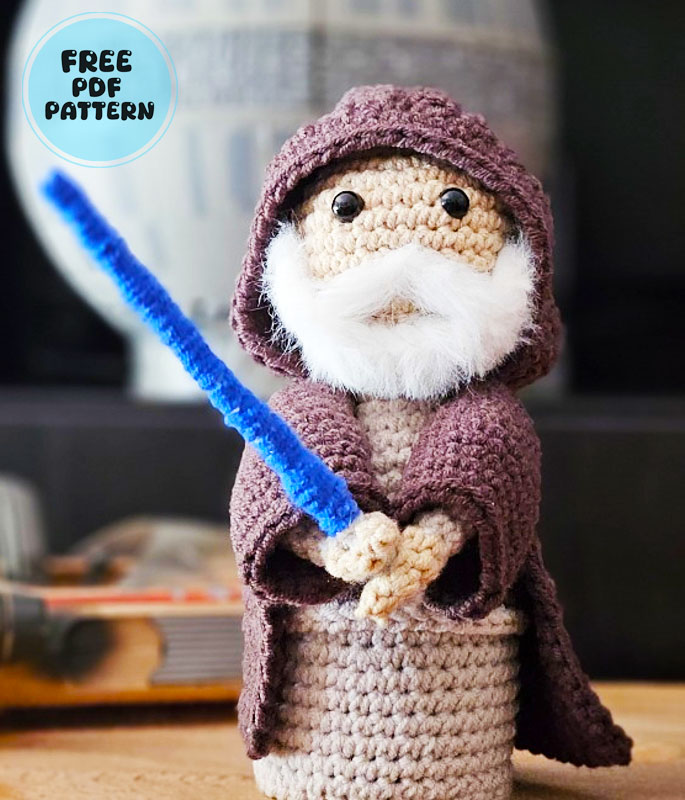
Obi-Wan Kenobi Star Wars Amigurumi Doll Pattern
The toy has a very cute design with both its costume and lightsaber. I think the most important detail about this toy is that almost all of the stages of its construction are explained with visuals. This explanation will make it much easier for you to make the toy. If you are ready, let’s take a look at the other details.
Designer: starry_giraffe
Materials
• 4mm crochet hook
• Scissors
• Yarn needle
• Hot glue
• 2 safety eyes (7mm diameter)
• Fiberfill stuffing
• Yarns:
Brown (cape)
Beige (body and arms)
Skin (face and hands)
Blue and gray (lightsaber)
Abbreviations
• mr: magic ring
• ch: chain
• sl st: slip stitch
• sc: single crochet
• inc: increase
• dec: decrease
Head
Start from the top of the head with skin colored yarn
1. 6 sc in mr
2. 6 inc (12)
3. (1 sc, 1 inc) repeat 6 times (18)
4. (1 inc, 2 sc) repeat 6 times (24)
5. (2 sc, 1 inc, 1 sc) repeat 6 times (30)
6. (4 sc, 1 inc) repeat 6 times (36)
7-12. 36 sc (36) [Fig. 2]

13. (4 sc, 1 dec) repeat 6 times (30)
14. (2 sc, 1 dec, 1 sc) repeat 6 times (24)
15. (2 sc, 1 dec) repeat 6 times (18)
Place safety eyes between rounds 7 and 8 separated by 5 sc. Start stuffing [Fig. 3]
16. (1 sc, 1 Dec) repeat 6 times (12)
sl st changing to beige charn

Body
Keep going from the end of the head with beige yarn
1. 12 sc (12)
2. 12 inc (24)
3. 24 sc (24)
4. (3 sc, 1 inc) repeat 6 times (30)
5. 30 sc (30)
6. 15 sc, 1 inc, 14 sc (31)
7. 31 sc (31)
8. 1 inc, 30 sc (32)
9. 32 sc (32)
10. 8 sc, 1 inc, 23 sc (33)
11. 33 sc (33)
12. 20 sc, 1 inc, 12 sc (34)
13. 34 sc (34) [Fig. 4]

14. 17 sc, 1 inc, 16 sc (35)
15. 35 sc (35)
16. 1 inc, 34 sc (36)
17-19. 36 sc (36), fasten off [Fig. 5] and stuff [Fig. 6]

Base
Crochet with the same yarn as the body
1. 6 sc in mr (6)
2. 6 inc (12)
3. 12 inc (24)
4. (3 sc, 1 inc) repeat 6 times (30)
5. 30 sc (30)
6. (2 sc, 1 inc, 2 sc) repeat 6 times (36) [Fig. 7]

Join the base with the last round of the body by doing single crochets all around that join 1 sc of the body with 1 sc of the base (36) [Fig. 8]

Before finishing joining both parts, place a cardboard or plastic circle [Fig. 9] on the base [Fig. 10] in order to make the base more rigid and the amigurumi more stable. Finish stuffing the body.

Belt
Wide part
1. Make 36 ch with beige yarn
2. 1 sc in 2nd ch from the hook, 33 sc, 3 sc in the last stitch, turn, 33 sc on the other side, 1 inc in the last stitch, fasten off [Fig. 11]

Central part
1. Using brown yarn, make 1 sl st in each post of the chains in the central part of the belt [Fig. 12 and 13]

Join the belt to the body between rounds 11 and 13 [Fig. 14]
Hood
Make two parts working in rows:
1. 11 ch, 1 sc in the 2nd ch from the hook, 9 sc (10), 1 ch, turn
2. 10 sc (10), 1 ch, turn
3. 9 sc, 1 inc (11), 1 ch, turn
4. 11 sc (11), 1 ch, turn
5. 10 sc, 1 inc (12), 1 ch, turn
6-11. 12 sc (12), 1 ch, turn
12. Skip 1st sc, 11 sc (11), 1 ch, turn
13. 9 sc, 1 sl st (10), skip last sc, 1 ch, turn
14. Skip 1st sc, 9 sc (9), 1 ch, turn
15. 7 sc, 1 sl st (8), skip last sc, 1 ch, turn
16. Skip 1st sc, 7 sc (7), 1 ch, turn
17. 5 sc, 1 sl st (6), fasten off [Fig. 15]

Place the two parts one on top of the other and join with the yarn needle the top and the back side [Fig. 16]

Join brown yarn in the lower corner and start working in rounds:
1. On the bottom side make 5 sc, 5 dec, 5 sc (15) [Fig. 17]

Continue on the front side by making 1 sc on the end of each row (17 sc + 1 sc in the union of both parts + 17 sc) (35) [Fig. 18]

2. 50 sc (50)
3. 1 inc, 13 sc, 1 inc, 35 sc (52)
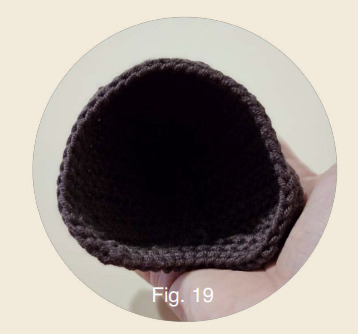
4. 1 sl st, fasten off [Fig. 19]
Robe
Join yarn in the 1st sc on the lower side of the hood and start working in rows:
1. 15 sc in the front loop only (15), 1 ch, turn
2. 1 inc, 13 sc, 1 inc (17), 1 ch, turn
3. 1 inc, 15 sc, 1 inc (19), 1 ch, turn
4. 1 inc, 17 sc, 1 inc (21), 1 ch, turn
5. 1 inc, 19 sc, 1 inc (23), 1 ch, turn
6. 7 sc, 1 inc, 7 sc, 1 inc, 7 sc (25), 1 ch, turn
7. 25 sc (25), 1 ch, turn
8. 12 sc, 1 inc, 12 sc (26), 1 ch, turn
9. 1 inc, 24 sc, 1 inc (28), 1 ch, turn
10. 9 sc, 1 inc, 8 sc, 1 inc, 9 sc (30), 1 ch, turn
11. 30 sc (30), 1 ch, turn
12. 1 inc, 28 sc, 1 inc (32), 1 ch, turn [Fig. 20]

13-18. 32 sc (32), fasten off
Join brown yarn on the joint between the robe and the hood and make a row of single crochet all around the robe: 17 sc on the first side, 1 inc on the corner, 30 sc on the bottom, 1 inc on the corner, 17 sc on the other side [Fig. 21]

Beard
Make 10 ch using a white furry yarn and join to the head giving it a beard shape [Fig. 22]

Moustache
Cut two strands of the same furry white. Sew one side of both strands to the center of the face and place the other under the beard [Fig. 22]
Arms
Make two arms starting with beige yarn:
1. 4 sc in mr (4)
2. (1 sc, 1 inc) repeat 2 times (6)
3-12. 6 sc (6), change to skin yarn to make the hand
13. 6 sc
14. (2 sc, 1 ch skipping 1 sc to make the hole for the lightsaber) repeat 2 times (6) [Fig. 23]

15. (1 sc, 1 ded) repeat 2 times (4), insert a wire to be able to shape the arm and fasten off [Fig. 24]

Sleeves
Make two sleeves with brown yarn:
1. 6 sc in mr (6)
2. (1 sc, 1 inc) repeat 3 times (9)
3. 9 sc (9)
4. (2 sc, 1 inc) repeat 3 times (12)
5. 12 sc (12)
6. (3 sc, 1 inc) repeat 3 times (15)
7. 15 sc (15)
8. (4 sc, 1 inc) repeat 3 times (18)
9-14.18 sc (18), fasten off [Fig. 25]

Insert the arm inside the sleeve and join the starts of both parts in order to ensure the arm is completely inside [Fig. 26 and 27]

Sew the sleeves to the robe and shape the arms
Lightsaber
Cut a 11cm straight wire
Wrap grey yarn around the first 2cm to make the handle and blue yarn around the rest of the wire to make the saber.
Place the lightsaber on both hands inserting the handle through the holes [Fig. 28]

Finished Obi-Wan

