


As many of you know, Shiba is the symbol of Dogecoin, perhaps one of the most famous cryptocurrencies. Actually, Shiba inu, a very cute and furry Japanese dog, is a very eye-catching and very rare animal with its bright yellow fur. Today, I will introduce you to the amigurumi pattern of this very smart dog. Although the making of the toy is not supported by visuals, it has a very good explanation. Therefore, I do not think you will have any difficulty in making the toy.
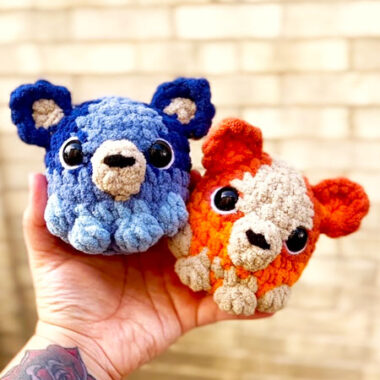
Plush Shiba Inu Crochet Pattern
If you wish, you can make the toy using black yarn. I can say that I liked the toy made using brown and white yarn more.
Designer: iuli.crochets
Materials
• Yarn Colour A (light brown/black/any)
• Yarn Colour B (white)
• For the black version: Yarn Colour C (light brown)
• Yarn Colour D (pink/red)
• 4.5mm crochet hook/hook matching your yarn’s weight
• 8mm safety eyes
• Brown/black felt
• Fiber Filling, scissors, hot glue gun
Abbreviations
ch – chain
mr – magic ring
Sc – single crochet
Flo – Front Loops only
dc – double crochet
sl st – slip stitch
inc – increase
dec – decrease
Head and Body-begin in colour A
R1: 6sc in MR (6)
R2: (sc, inc) x3 (9)
R3: (2sc, inc) x3 (12)
R4: (sc, inc) x6 (18)
R5: (2sc, inc) x6 (24)
R6: sc around (24)
R7: (3sc, inc) x6 (30)
Change to Colour B
R8-R9: sc around 2 rows (30×2)
If you are using safety eyes, insert them between R7-R8, about 5 stitches apart.
R10: (3sc, dec) x6 (24)
Stuff the head fully.
R11: 12dec (12)
R12: in FLO (sc, inc) x6 (18)
Body begins here
Change to Colour A
R13: sc around (18)
R14: (2sc, inc) x6 (24)
R15-R17: sc around 3 rows (24 x3)
R18: (2sc, dec) x6 (18)
R19: (sc, dec) x6 (12)
R20: 6dec (6)
Fasten off, cut the tail, use it to sew the hole on the last row closed.
Bottom Paws (make 2)- Begin in Colour B
R1: 6sc in MR (6)
R2: (sc, inc) x3 (9)
Change to colour A
R3: (2sc, inc) x3 (12)
R4: (2sc, dec) x3 (9)
Sl st and fasten off. Leave a long tail for sewing.
Top Paws (make 2)- Begin in Colour B
R1: 6sc in MR (6)
R2: (sc, inc) x3 (9)
Change to colour A
R3:sc around (9)
R4: (sc, dec) x3 (6)
Sl st and fasten off. Leave a long tail for sewing.
Ears (make 2) – In colour A
R1: 3sc in MR (6)
R2: 3inc (6)
R3: sc around (6)
R4: (sc, inc) x3 (9)
Sl st and fasten off. Leave a long tail for sewing.
Snout – In colour B/ colour C for black ver.
R1: 4ch, begin in 2nd chain from hook, 2sc, inc in the last chain, 2sc on other side (6)
R2: (sc, inc) x3 (9)
Sl st and fasten off. Leave a long tail for sewing.

Assembly
The next page includes a collage of the plushie seen from all sides to help with sewing.
• Stuff the top paws and sew them onto the body on the sides, between R12-R14, about 6 stitches apart.
• Leave one row under the arms empty, and sew the bottom paws between R16- R18, about 3 stitches apart. Make sure to stuff the paws.
• Sew the snout in the middle of the face, between R8-R6, about 4 stitches across.
• Sew the ears onto the head on both sides, situated a little bit at the back of the head, starting from R6 to between R3-R2
• Sew 2 spots using Colour B/Colour C onto the ears, between R2-R4 of the ears • Cut a reverted half triangle with smooth edges for the nose, glue it in the middle of the snout, on R2
• For the brown version: cut 2 half ovals for the eyes in brown felt, about 1.5 stitches long and glue them on R7, leaving 1 stitch from the snout
• For the black version: using white yarn, sew 2 white parts right under the eyes
• Sew the eyebrows of the Shiba using Colour B/Colour C between RR7-R6 and R6-R5 angled downwards, above the eyes, 2 stitches across as shown below
• Sew 2 little hearts in colour D for the cheeks, next to the eyes.

