


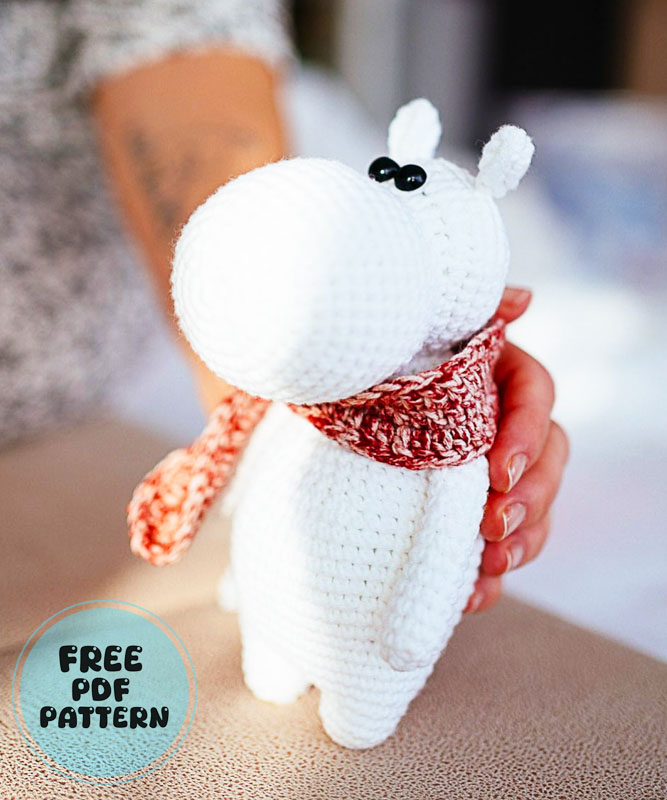
Hello friends. Today we will crochet the moomin amigurumi pattern. Created by Tove Jansson, this character is a character with extraordinary powers. Moomin amigurumi has white color. Actually, if we look at the moomin amigurumi, it looks a bit like a hippo. I must admit that. But when you look at its defining features, you can see moomin. You don’t need to know a lot of crochet techniques to make this fully crochet amigurumi. You just need to know the basics.
White Moomin Hippo Crochet Pattern
Moomin lovely cartoon amigurumi toy. A good example of amigurumi for beginner crochet lovers. You can find all the necessary materials in the description and it is very easy to make. Now let’s crochet the moomin amigurumi step by step.
Designer: mumigurumi
Materials
Yarn
Scheepjes SOFTFUN
● Fibre content: 60% cotton, 40% acrylic
● Yarn weight: DK
● Length: 140 meter
● Ball weight: 50 gram
● Colour: white
You will also need
– 3 mm hook
– 9 mm safety eyes
– polyester fiberfill for stuffing
– tapestry needle
– stitch makers
Abbreviations
Ch: chain
Sc: single crochet
Dc: double crochet
Inc: increase
Dec: decrease
Sl st: slip stitch
Notes:
– You can use any yarn of the same thickness
– Work in continuous rounds, do not join or turn unless noted
– Start with an adjustable ring (“Magic Ring”)
– Use stitch markers to indicate the beginning of each row
– It’s important you select the right hook; try to use another hook size if there are holes between stitches
LEGS
Round 1: Sc 6 in magic ring {6}
Round 2: Inc x 6 {12}
Round 3-4: Sc around {12}
Fasten off. Make the 2nd leg using the same pattern. Do not fasten off, as we will use this yarn.
BODY
We will now go on crocheting the body.
Round 5: In this round, we will connect the legs in a circle, ending with 32 sts in total.
With the 2nd leg on your hook Ch 4 and connect with the 1st leg with a Sl st. Now Sc around the 1 st leg (12) and work 1 Sc in each ch along the ch 4 (opposite side of the chain).
Sc 12 around the second leg and 4 again. Count to make sure you have 32 sts in total.
Round 6: [Inc, sc 3] x 8 {40}
Rounds 7-10: Sc around {40}
Round 11: [Inc, sc 4] x 8 {48}
Rounds 12-18: Sc around {48}
Stuff as you go.
Round 19: [Dec, sc 6] x 6 {42}
Rounds 20-22: Sc around {42}
Round 23: [Dec, sc 5] x 6 {36}
Rounds 24-25: Sc around {36}
Round 26: [Dec, sc 4] x 6 {30}
Round 27: Sc around {30}
Round 28: [Dec, sc 3] x 6 {24}
Round 29: Sc around {24}
Round 30: [Dec, sc 2] x 6 {18}
Stuff firmly. Fasten off. Leave a long tail for sewing.
HEAD
Round 1: Sc 6 in magic ring {6}
Round 2: [Inc] around {12}
Round 3: [Inc, sc 1] around {18}
Round 4: [Inc, sc 2] around {24}
Round 5: [Inc, sc 3] around {30}
Round 6: [Inc, sc 4] around {36}
Round 7: [Inc, sc 5] around {42}
Round 8-14: Sc around {42}
Round 15: [Dec, sc 5] around {36}
Round 16: [Dec, sc 4] around {30}
Round 17: [Dec, sc 3] around {24}
Round 18: Sc around {24}
Round 19: [Hdc, Inc hdc] x 6 times, (sc 2, inc) x 4 times {34}
Round 20: [Hdc, Inc hdc] x 6 times, sc 16 {40}
Attach safety eyes with felt circles approximately between rounds 20-21. If you aren’t going to lock them, you can also do it after the doll amigurumi is finished.
Round 20-22: Sc around {40}
Round 23: [Dec, sc 3] x 8 times {32}
Round 24: [Dec, sc 2] x 8 times {24}
Round 25: [Dec, sc 2] x 6 times {18}
Round 26: [Dec, sc 1] x 6 times {12}
Round 27: Dec around {6}
Stuff firmly. Fasten off and weave in ends, but leave a long end.
EARS (make 2)
Do not stuff.
Round 1: Sc 6 in magic ring {6}
Round 2: Inc x 6 {12}
Rounds 3-4: Sc around {12}
Fold in half and crochet through both layers. Fasten off. Leave a long tail for sewing.
ARMS (make 2)
Stuff slightly.
Round 1: Sc 6 in magic ring {6}
Round 2: [Inc, sc 1] x 3 {9}
Rounds 3-15: Sc around {9}
Round 16: [Dec, sc 1] x 3 {9}
Fold in half and crochet through both layers. Fasten off. Leave a long tail for sewing.
TAIL
Do not stuff.
Round 1: Ch 21 turn {21}
Round 2: Sl St 20 from the 2nd chain from the hook
Make a brush at the end.
SCARF
With red yarn. Do not stuff.
Round 1: Ch 71
Round 2: Dc 70 into second chain from hook
Round 3: Ch 1, turn and continue working on the opposite side of the chain: Dc 70
Fasten off and weave in ends.
Finishing:
1. With yarn tail and needle, sew all parts together;
2. Attach safety eyes if you haven’t done it earlier.
You are now finished! Thank you so much for supporting my work. Feel free to tag me(@mumigurumi) in your photos on Instagram:
