


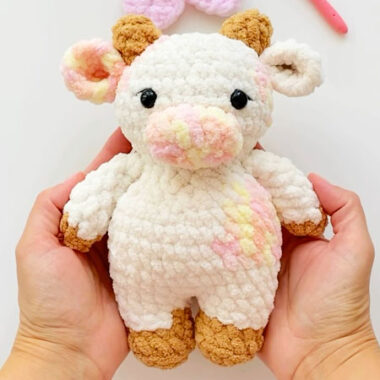
Hello my dears. I am trying to share different crochet patterns for you as much as I can. Today, there is a very nice amigurumi pattern. A very nice and very easy cow!. Finding a crochet cow pattern has become quite easy lately. If you wish, you can check out other free crochet cow amigurumi patterns.
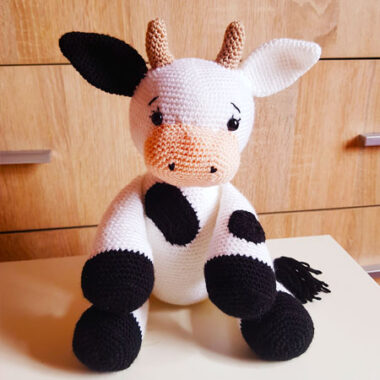
Marilyn the Cow Amigurumi Toy
You can also use this cow amigurumi as a key chain. A few spots of cow amigurumi look quite nice. Especially the spots. Now if you’re ready, let’s get started. The random positioning of the amigurumi cow dolls and their different sizes seem to add a very unique design touch to the toy.
Designer: les.mailles.du.rocher
Materials
Cotton ricorumi (white, black, pink, brown) Crochet hook : 3 mm
Yarn needle
Fiberfill for stuffing
Security eyes (6 mm)
Stitch marker
Scissors
Abbreviations
Rnd : round
MR : magic ring
Ch : chain
sl st : slip stitch
sc : single crochet
inc : increase
dec : decrease
bo : bobble stitch
BLO : back loop
FLO : front loop
()* : repeat till the end of round
[ ] : total number of stitches in the round
Head
In white.
Rnd 1: MR, 6 sc [6]
Rnd 2 : (inc)* [12]
Rnd 3 : sc, inc)* [18]
Rnd 4 : (2 sc, inc)* [24]
Rnd 5 : (3 sc, inc)* [30]
Rnd 6 : (2 sc, inc, 2 sc)* [36]
Rnd 7 : (5 sc, inc)* [42]
Rnd 8 : 42 sc [42]
Rnd 9 : (3 sc, inc, 3 sc)* [48]
Rnd 10 – 17 : 48 sc [48]
Rnd 18 : (3 sc, dec, 3 sc)* [42]
Rnd 19 : (5 sc, dec)* [36]
Insert the safefy eyes btw Rnds 10 & 11 with approx 7 stitches apart. Start stuffing.
Rnd 20 : (2 sc, dec, 2 sc)* [30]
Rnd 21: (3 sc, dec)* [24]
Rnd 22 : (2 sc, dec)* [18]
Rnd 23 : (inc, 2 sc)* [24]
Rnd 24 : (3 sc, inc)* [30]
Rnd 25 : 30 sc [30]
Rnd 26 : (2 sc, inc, 2 sc)* [36]
Rnd 27 : 36 sc [36]
Rnd 28 : (5 sc, inc)* [42]
Rnd 29 – 38 : 42 sc [42]
Continue stuffing.
Rnd 39 : (5 sc, dec)* [36]
Rnd 40 : BLO – (2 sc, dec, 2 sc)* [30]
Rnd 41: (3 sc, dec)* [24]
Rnd 42 : (2 sc, dec)* [18]
Finish stuffing.
Rnd 43 : (1 sc, dec)* [12]
Rnd 44 : (dec)* [6]
Fasten off and close.
Muzzle
in Pink
Make a ch 6. Crochet around the ch, starting in the 2nd ch from hook.
Rnd 1: 4 sc, 3 sc in last stitch, 3 sc, inc [12]
Rnd 2 : 3 sc, 3 inc, 3 sc, 3 inc [18]
Rnd 3- 4: 18 sc [18]
Fasten off, leaving a tail for sewing. Embroider the nostrils.
Ears x2
Inner ears:
In pink.
Rnd 1: MR, 6 sc [6]
Rnd 2 : (inc)* [12]
Fasten off.
Outer ears:
In black.
Rnd 1 : MR, 6 sc [6]
Rnd 2 : (inc)* [12]
Don’t fasten off, crochet the inner and outer ears together, wrong sides facing.
Rnd 3 : crochet through both inner and outer ears : (3 sc, inc)* [15] 1 sl st.
Fasten off, leaving a tail for sewing.
Horns x2
In brown.
Rnd 1: MR, 4 sc [4]
Rnd 2 : (1 sc, inc)* [6]
Rnd 3 : 6 sc [6]
Fasten off, leaving a tail to sew.
Add black fringes between the horns and brush the threads.
Udders
In pink.
Rnd 1: MR, 6 sc [6]
Rnd 2 : (inc)* [12]
Rnd 3 : (1 sc, inc)* [18]
Rnd 4 : 1 sc, FLO – bo, 4 sc, FLO – bo, 3 sc, FLO – bo, 4 sc, FLO – bo, 2 sc [18]
Rnd 5 : 1 sc, 1 sc in BLO of previous Rnd, 4 sc, 1 sc in BLO, 3 sc, 1 sc in BLO, 4 sc, 1 sc in BLO, 2 sc [1S]
Fasten off, leaving a tail to sew.
Arms x2
Start in black.
Rnd 1: MR, 6 sc [6]
Rnd 2 : (inc)* [12]
Rnd 3 : BLO -12 sc [12]
Rnd 4 :12 sc [12]
Change to white.
Rnd 5- 9: 12 sc [12]
Stuff.
Rnd 10 : (4 sc, dec)* [10]
Rnd 11 – 12 : 10 sc [10]
Rnd 13 : (3 sc, dec)* [8]
Fold in half and crochet through both sides 4 sc.
Fasten off, leaving a tail for sewing.
Black Patches
Make a ch 4. Crochet around the ch, starting in 2nd ch from hook:
Rnd 1: 2 sc, 3 sc in last stitch, 2 sc, 1 sl st in first sc.
Fasten off.
For a larger patch, add a Rnd :
Rnd 2 :1 sc, 3 inc, 1 sc, 3 inc [14],1 sl st.
Fasten off, sew or glue to the body.
Legs x2
Start in black.
Rnd 1: MR, 7 sc [7]
Rnd 2 : (inc)* [14]
Rnd 3 : BLO -14 sc [14]
Rnd 4 :14 sc [14] Change to white.
Rnd 5 :14 sc [14]
Rnd 6 : (5 sc, dec)* [12]
Rnd 7 : 12 sc [12]
Stuff.
Rnd 8 : (4 sc, dec)* [10]
Rnd 9 – 10 : 10 sc [10]
Rnd 11: (3 sc, dec)* [8]
Fold in half and crochet through both sides 4 sc. Fasten off, leaving a tail for sewing.
Tail
Make a ch 6. Fasten off and add fringes.

