


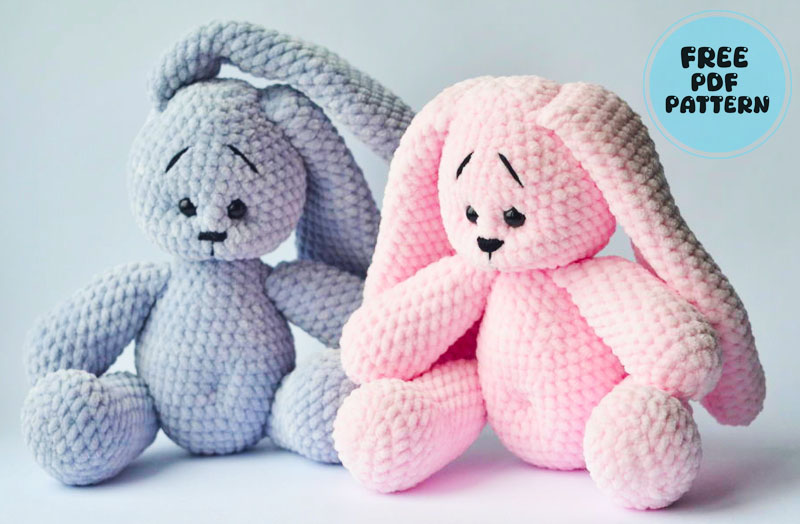
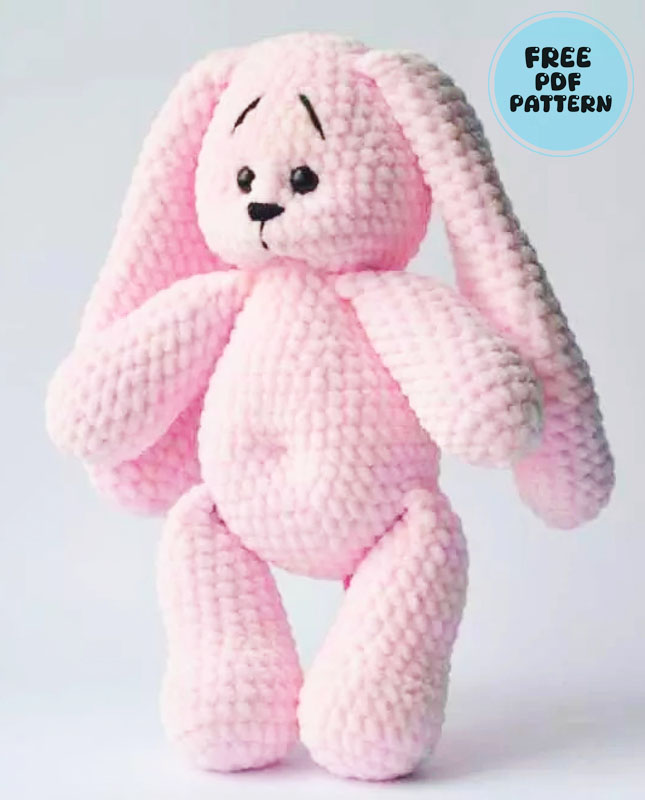
Today I want to introduce you to a very cute bunny amigurumi pattern. The crocheted bunny has a very unique structure and a very tightened appearance. Although the crocheted bunny’s body and head have a very elegant design, it is difficult to say the same for the arms of the toy. Maybe a nicer arm design could have been made.
Chubby Bunny Lolly Crochet Pattern
I tried very hard to make the description as easy and understandable as possible. I count on your honesty, respect for my work and mention of me as an author when publishing your work. You can use the toy made according to this pattern at your own discretion. The toy, made with the materials specified in the description, is 24 cm (9.4 inches). If you have any questions during crocheting, you can contact me in any convenient way:
Designer: @mommys_joy_by
Materials and tools:
1. Super Balky/Super Chunky velvet yarn (e.g., Himalaya Dolphin Baby 120m per 100g):
color at your discretion.
2. Lace weight yarn/lply (e.g., Yarnart Iris 138m per 20g):
black color for sewing embroidering eyebrows and a nose;
yarn in the color of your toy (for needle sculpting, using a needle).
3. Hook size 4 nun.
4. Polyester toy filling.
5. Scissors.
6. Stitch marker.
7. Safety eyes with a diameter of 10 mm.
8. Tapestry needle.
Abbreviations
MR – Amigurumi Magic ring
sc : Single Crochet
inc : Increase
dec : Decrease
st: Stitch
Crochet instruction.
We begin to crochet the toy from the legs, ears and tail, i.e. all these pieces will be crocheted into the body. If you wish, you can sew all the pieces to the body.
Fore Legs.
Crochet 2 similar pieces.
Rnd 1. 6 sc in MR
Rnd 2. 6 inc 12
Rnd 3. (1 sc. inc) x6 18
Rnd 4-6. 18 sc 3 rounds 18
Rnd 7. (4 sc. dec) x3 15
Rnd 8-12. 15 sc 5 rounds 15
Rnd 13. (3 sc. dec) x3 12
Rnd 14-15. 12 sc 2 rounds 12
Stuff the foreleg with fiberfill.
Fold the foreleg in half and crochet 6 sc tInough both sides. Weave in the yarn ends.
Hind legs.
Crochet 2 similar pieces.
Rnd 1 Ch6
Rnd 2. Start in the second chain from the hook. 12
Work around the fotmdation chain. forming an oval: 4 sc. 3 sc in the last chain, 3 sc, inc
Rnd 3. inc, 3 sc, 3 inc, 3 sc, 2 inc 18
Rnd 4. 1 sc. inc. 3 sc, (1 sc. inc) x3. 3 sc. (1 sc, inc) x2 24
Rnd 5-7. 24 sc 3 rounds 24
Rnd 8. 6 sc, (2 sc, dec) x3, 6 sc 21
Rnd 9. 6 sc, (1 sc, dec) x3, 6 sc 18
Rnd 10-14. 18 sc 5 rounds 18
Rnd 15. (4 sc, dec) x3 15
Rnd 16. 15 sc 15
Rnd 17. (3 sc, dec) x3 12
Rnd 18. 12 sc 12
Stuff the hind leg with fiberfill.
Fold the hind leg in half and crochet 6 sc through both sides. Weave in the yarn ends.
Ears.
Crochet 2 similar pieces
(do not stuff the ears with fiberfill)
Rnd 1. 6 sc in MR 6
Rnd 2. 6 inc 12
Rnd 3. (1 sc, inc) x6 18
Rnd 4. 18 sc 18
Rnd 5. (5 sc, inc) x3 21
Rnd 6. (6 sc, inc) x3 24
Rnd 7-8. 24 sc 2 rounds 24
Rnd 9. (7 sc. inc) x3 27
Rnd 10-12. 27 sc 3 rounds 27
Rnd 13. (7 sc, dec) x3 24
Rnd 14-15. 24 sc 2 rounds 24
Rnd 16. (6 sc, dec) x3 21
Rnd 17-22. 21 sc 6 rounds 21
Rnd 23. (5 sc, dec) x3 18
Rnd 24-28. 18 sc 5 rounds 18
Rnd 29. (4 sc, dec) x3 15
Rnd 30. 15 sc 15
Fold the ear in half and crochet 7 sc through both sides. Weave in the yam ends.
Tail
Rnd 1. 6 sc in MR 6
Rnd 2. 6 inc 12
Rnd 3. (1 sc. inc) x6 18
Rnd 4. (1 sc. dec) x6 12
Rnd 5. 6 dec 6
Fold the tail in half and crochet 3 sc through both sides. Weave in the yarn ends.
Body.
Crochets from bottom to top. Stuff as you go.
Rnd 1. 6 sc in MR 6
Rnd 2. 6 inc 12
Rnd 3. (1 sc. inc) x6 18
Rnd 4. (2 sc. inc) x6 24
Rnd 5. (3 sc, inc) x6 30
Rnd 6. (4 sc, inc) x6 36
Rnd 7. 36 sc 36
Rnd 8. (5 sc, inc) x6 42
!Join the hind legs in the next round.
When you reach the place where you need to join the leg, insert the hook fust into the loops on die leg, then into the loops on the body, stretch die thread and crochet sc. So crochet all 6 stitches on the leg with the stitches on the body. Then crochet along the body and when you reach the place where you need to join the second leg, repeat the same.
Rnd 9. 42 sc (body and legs) 42
Rnd 10. 42 sc 42
In the next round join the tail into the body. Approximate location at the back in the center, between the hind legs. Crochet in the same way as the legs – crochet together 3 stitches of the tail and the body.
Rnd 11. 42 sc (body and tail) 42
Rnd 12. 42 sc 42
Rnd 13. (5 sc. dec) x 6 36
Rnd 14. 36 sc 36
Rnd 15. (4 sc. dec) x 6 30
Rnd 16. 30 sc 30
Rnd 17. (3 sc, der) x 6 24
Rnd 18. 24 sc 24
Rnd 19. (2 sc, dec) x 6 18
Sniff the body with fiberfill.
Crochet them in the same way as the hind legs. Crochet all 6 stitches on the foreleg with the stitches on the body.
The forelegs should be in line with the hind legs. If you see that the foreleg is shifted (forward or backward), crochet the munber of stitches in front of the leg, which will allow the foreleg to be in line with the hind leg in your toy. Repeat the same with the second foreleg.
Rnd 20. 18 sc (body and forelegs) 18
Rnd 21. (1 sc, dec) x 6 12
Stuff the body with fiberfill.
Continue crocheting the head.
Head.
Rnd 22. 12 inc 24
Rnd 23. (1 sc, inc) x 12 36
Rnd 24. (5 sc, inc) x 6 42
Rnd 25-30. 42 sc 6 rounds 42
Insert safety eyes between rormds 29 and 30. Determine the center of the face, the distance between the eyes is 4-5 stitches.
Rnd 31. (5 sc, dec) x 6 36
Rnd 32. 36 sc 36
Rnd 33. (4 sc, dec) x 6 30
Rnd 34. 30 sc 30
Rnd 35. (3 sc, dec) x 6 24
In the next round, attach the ears to the head.
Crochet diem M the same way as the hind legs / forelegs. Crochet all 7 stitches on the ears together with the stitches for the head.
The ear should be in line with the legs, visually above them. Repeat with the other ear.
Stuff the head with fiberfill.
Rnd 36. 24 sc (head and ears) 24
Rnd 37. (2 sc, dec) x 6 18
Rnd 38. 18 sc 18
Rnd 39. (1 sc, dec) x 6 12
Stuff the head with fiberfill.
Cut the thread and fastest off. Pull the hole closed. Hide thread ends inside the piece.
Assembly and Decoration.
After the toy is crocheted, you need to decorate the muzzle. Needle Sculpting for the muzzle.
Step 1. Insert the needle at the bottom of the muzzle and exit it through the outside of the right eye.
Step 2. Move back several stitches to the side and insert the needle in the inner comer of the right eye. Exit the needle through the bottom of the muzzle.
Repeat step 1. Slightly tighten by pulling on both ends of the threads.
Repeat step 2 Make needle sculpting from the other side:
Step 1. Insert the needle at the bottom of the muzzle and exit it through the outside of the left eye.
Step 2. Move back several stitches to the side and insert the needle in the inner comer of the left eye. Exit the needle through the bottom of the muzzle.
Tighten this side. Fix the threads by making a laiot at the bottom of the nmzzle. Weave in the thread ends inside of the piece.
Embroider a nose with black yarn and make a snipe front the nose down the muzzle. Embroider eyebrows. Hide the thread ends inside.
Needle Sculpting for the on the tummy (navel).
Insert the needle under the tail and exit it through the center of the tummy. Move a few stitches to the side and insert the needle into your tummy. Exit the needle under the tail. Repeat one more time. Tighten. Sectre the threads by tying a knot under the tail.
Hide the threads ends inside.
The plush btmny is ready.
Thanks for crocheting with me!
I hope everything was clear and the process was interesting.
I count on your honesty, respect for my work and credit me as an author (@.mommys_joy_by Anna Vasilyeva) when publishing your work.
Thank you!!!


