


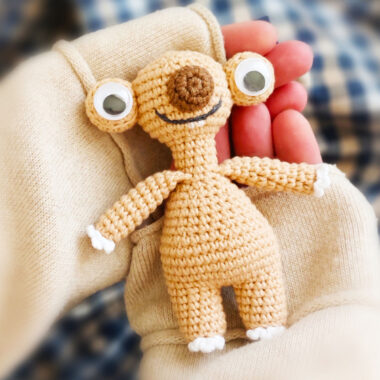
If you are bored with classic totoro amigurumi designs, the demiwool design blue totoro crochet pattern that we will share with you is just for you. A crochet amigurumi pattern created using a very detailed and sufficient number of images is waiting for you. We can say that the crochet totoro with tiny eyes is generally blue, but if you wish, you can easily make a gray totoro crochet toy.
Blue Totoro with Bag Amigurumi PatternCrochet
You can find how the white color is made and where the borders are while crocheting the body of the toy in the pattern. Now, if you are ready, let’s take a look at the crochet pattern of the toy.
Designer: demiwool
Material:
1. Yarn: any sport or DK light
weight yarn (I used YarnArt Jeans,
160m/50g)
2. Hook: Size 2.0 – 2.5mm
3. 5mm safety eyes
4. White wool felt
5. Fiberfill
6. Stitch markers, pins
7. Yarn needle, Scissors
8. Black embroidery threads
Size:
If you use yarn as me, the finished doll will be around 12cm / 4.7 inch tall
Color:
Blue, white, light brown, a little bit dark brown.
Abbreviations:
R: round
MR: magic ring
ch: chain
sc: single crochet
inc: increase
dec: decrease
dc: double crochet
dc-inc: double crochet increase (2dc in the same stitch)
slst: slip stitch

LEGS
Make 2, use blue yarn
First leg:
R1: MR, 6sc (6)
R2: 6inc (12)
R3: (sc, inc) x 6 (18)
R4: (5sc, inc) x 3 (21)
Fasten off and cut the yarn. You can leave a short tail or weave in the end.
Second leg: crochet same as the first leg, but do not cut the yarn, we will connect 2 legs together and make the body (pic 1).

BODY
We will mix white yarn and blue yarn for the Body. Please note: black letters: blue yarn, red letters: white yarn
R1: we are now at the end of R4 of the second leg. Make ch1, then connect with the first leg by 1sc, then continue crocheting 20sc left on the first leg, then 1sc on the chain, then 21sc on the second leg. Now we have total 44sc for this round (pic 2).
R2: (10sc, inc) x 4 (48)
R3: (7sc, inc) x 6 (54)
R4: 54sc (54)
R5: (8sc, inc) x 2, 3sc, 5sc, inc, 6sc, 2sc, inc, (8sc, inc) x 2 (80)
R6: 22sc, 15sc, 23sc (60)
R7: 21sc, 17sc, 22sc (60)
R8: 20sc, 19sc, 21sc (60)
R9 – 16 (8 rounds): 19sc, 21sc, 20sc (60)
R17: 20sc, 19sc, 21sc (60)
R18: 21sc, 17sc, 22sc (60)
R19: 22sc, 15sc, 23sc (60)
R20: 23sc, 13sc, 24sc (60)

We finished the body. Stuff the legs and the body firmly. Cut the white yarn, keep the blue yarn. We will continue crocheting the head with blue yarn.
Before crocheting the head, we prepare the eyes with wool felt as below
EYES:
Cut 2 round pieces of wool felt and insert 2 safety eyes through those pieces of wool felt (pic 3, 4).

HEAD
R1: 60sc (60)
R2: (8sc, dec) x 6 (54)
R3 – 5 (3 rounds): 54sc (54)
R6: (7sc, dec) x 6 (48)
R7 – 8 (2 rounds): 48sc (48)
R9: (6sc, dec) x 6 (42)
R10: (5sc, dec) x 6 (36)
R11: (4sc, dec) x 6 (30)
Stuff the head. Insert the eyes between R6 and R7, 8 stitches apart
R12: (3sc, dec) x 6 (24)
R13: (2sc, dec) x 6 (18)
R14: (sc, dec) x 6 (12)
R15: 6dec (6)
Fasten off, cut the yarn, close the remaining gap and weave in the end (pic 5).

EARS
Make 2, use blue yarn
R1: MR, 6sc (6)
R2: (2sc, inc) x 2 (8)
R3: (3sc, inc) x 2 (10)
R4: (4sc, inc) x 2 (12)
R5: (5sc, inc) x 2 (14)
R6 – 8 (3 rounds): 14sc (14)
R9: (5sc, dec) x 2 (12)
R10: 6dec (6)
R11: 6sc (6)
Fasten off, stuff the ears, cut the yarn and leave a long tail for sewing (pic 6).

ARMS
Make 2, use blue yarn
R1: MR, 6sc (6)
R2: (sc, inc) x 3 (9)
R3: (2sc, inc) x 3 (12)
R4: (3sc, inc) x 3 (15)
R5: (4sc, inc) x 3 (18)
R6: (5sc, inc) x 3 (21)
R7 – 10 (4 rounds): 21sc (21)
Fasten off, stuff the arms, cut the yarn and leave a long tail for sewing (pic 7).
TAIL
Use blue yarn
R1: MR, 6sc (6)
R2: 6inc (12)
R3: (sc, inc) x 6 (18)
R4: 18sc (18)
R5: (2sc, inc) x 6 (24)
R6 – 8 (3 rounds): 24sc (24)
R9: (2sc, dec) x 6 (18)
R10 – 12 (3 rounds): 18sc (18)
Fasten off, stuff the tail, cut the yarn and leave a long tail for sewing (pic 8).

BAG
Use light brown yarn
R1: MR, 6sc (6)
R2: 6inc (12)
R3: (sc, inc) x 6 (18)
R4: (2sc, inc) x 6 (24)
R5 – 10 (6 rounds): 24sc (24)
R11: (2sc, dec) x 6 (18)
R12: 18dc-inc (36)
R13: 36dc (36)
Fasten off, cut the yarn and weave in the end.

Stuff the bag to R11 (pic 9)
Thread a needle with a long tail of dark brown yarn and insert it through R11 of the bag (pic 10). Pull tightly to close the bag. With the remaining dark brown yarn, wrap it around the bag as shown in pic 11, then tie it as shown in pic 12.

ASSEMBLY
1.Use black embroidery thread or black yarn to embroider:
a.the nose between R5 and R6 of the head;
b.the mouth at R2 of the head;
c.the whiskers on both sides of the face (pic 13).

2.Sew 2 ears on the top of the head, 3cm / 1.2inch apart (pic 14).
3.Sew 2 arms on both sides of the body, between R13 of the body and R1 of the head (pic 15)

4.Sew the tail at the bottom back of the body (pic 16)
5. Use blue yarn to embroider the triangular patterns on Totoro’s belly.

6.Sew the bag on one arm of the Totoro (pic 17, 18).
If you’ve made it this far – congratulations, you’re all done!
