


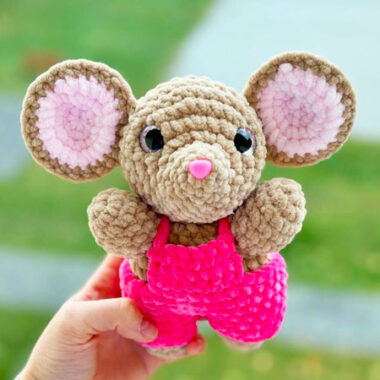
Friends, today I will share with you a realistic looking crochet mouse toy. I can easily say that the toy is a beginner level. In addition, since the details of the toy are supported by visuals, it will be much easier to make a crochet mouse. I think the legs of the toy made using gray plush yarn are a little sloppy.
Plush Realistic Mouse for Beginners Crochet Pattern
My preference would be to make the entire toy with plush yarn and if I have the opportunity in the next few days, I plan to make this toy and share its photos. The arms, legs and nose of the mouse are made using the same color yarn.
Designer: Ratliff Hannah Designs
Materials:
4mm hook
Grey chunky yarn
Pink Worsted yarn
Stuffing
Scissors
5 mm safety eyes
Tapestry needle
Stitches used:
Single, Half double, chain, magic ring, increase, decrease
Body: Worked in grey. Starting point is the nose
Round 1: Magic ring sc 4 (4)
Round 2: inc, sc 3 (5)
Round 3: *inc, sc* x2, inc (8)
Round 4: inc, sc 7 (9)
Round 5: inc, sc 2, dec, sc 4 (9)
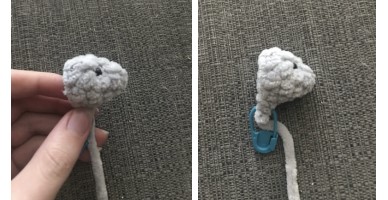
Install your safety eyes now between rows 3 and 4 of the head, about 2 stitches apart. The beginning of the round, or where your stitch marker is, is the base of the neck.
Round 6: *dec, sc* x2, sc, inc, sc (8)
Stuff head
Round 7: inc, sc 5, inc 2 (11)
Round 8: sc 2, inc, sc, inc, sc 2, inc, sc 3 (14)
Round 9: sc 10, *inc, sc* x2 (16)
Round 10: sc around (16)
Stuff as you go
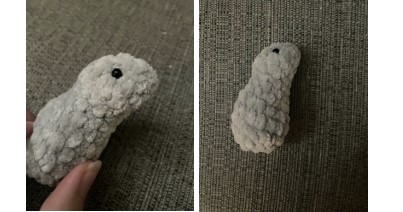
Nearly done with the body!
Round 11: sc 4, dec, sc 4, *dec, sc* x2 (13)
Round 12: * sc 2, dec* x2, dec, sc (10)
Stuff now and fill with beans so that it has some weight to him when he sits.
Round 13: *sc, dec* x3, sc (7)
Slp-st and fasten off and weave end through the BLO of each st around and tighten.
The finished body.
Putting together:
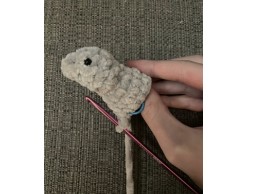
Embroider a nose
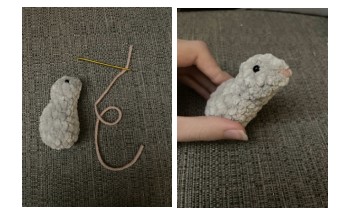
Tail: Worked in pink
You can braid a tail if you like and attach it to the mouse rump, but I did a chain stitch tail.
Insert your hook behind a stitch on the mouse rump and pull through a loop
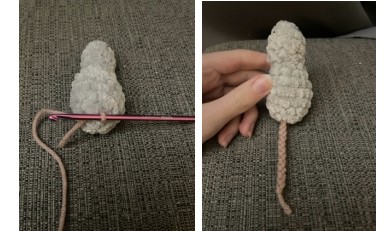
Chain as long as you would like your tail to be, I did ch 12. Fasten off and weave in the end at
the base of the tail.
Ears: Worked in grey, make two
Chain 3, hdc 2 in first ch, ch 2 and slp st in same ch as the hdc’s
Fasten off and sew about 1 row behind eyes.
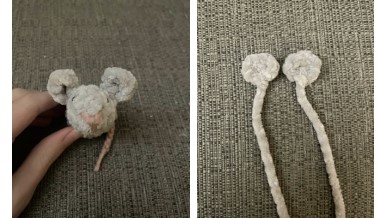
Feet: Worked in pink, make two
Round 1: ch 3 (3)
Round 2: starting in the second ch from hook, sc 2. Continue on the other side of the chain in the back bumps or ridges of the chain with sc 2. (4)
Round 3-5 (3 rounds): sc 4
Round 6: slp st in beginning sc, ch 1, turn
Insert your hook through the sts on both sides so that your hook is going through both sides of the foot, see first picture.
Sc 2 across top
Fasten off leaving tail.
Sew to mouse
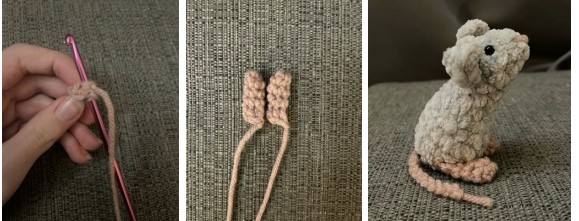
Arms: Worked in grey, make two.
Row 1: ch 6
Row 2: starting in the second ch from hook, Sc 5
Fasten off and sew to mouse so the paws can touch.
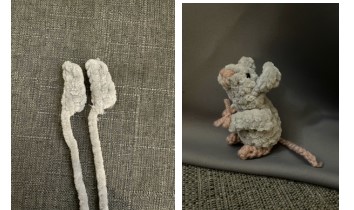
I tied the paws together in a bow, but this is optional
I hope you enjoyed making your little mouse!! You are done!

