


Dear friends, today I will share a cute dress bunny amigurumi pattern. The crochet bunny has a pretty looking dress and headband. Actually, crochet bunny is easy to make, but the dress and headband can be a bit difficult. That’s why I suggest you first examine the pattern of her headband and dress. Then you can start making amigurumi bunny. I hope you enjoyed the free amigurumi pattern I shared today. Now if you’re ready, let’s get started.
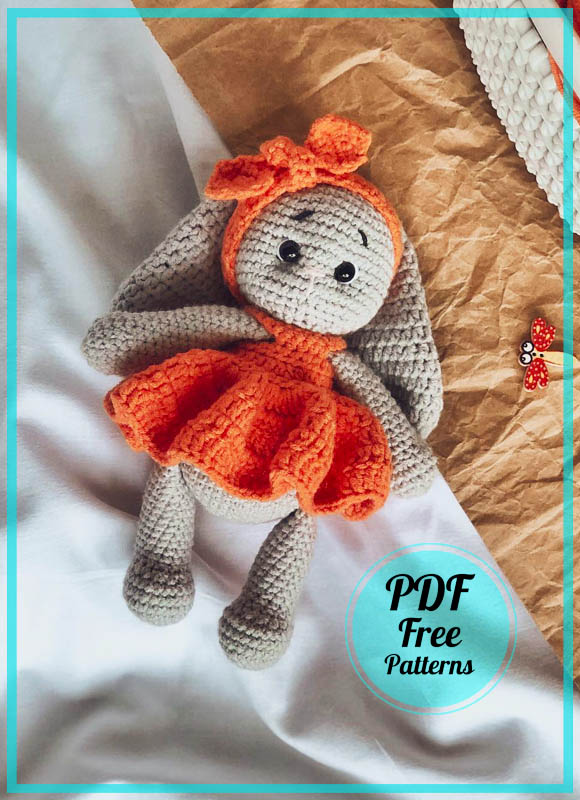
Lucia Bunny Doll in Orange Dress Crochet Pattern
As you can see, the bunny has a gorgeous headband and a very stylish dress. I really liked the pattern of the dress made using orange yarn, but making this dress can be difficult for many of our friends. Now if you are ready, let’s get started.
Designer: lullaby__crocheting
Necessary materials and tools
1. Yarn art jeans (100 g – 320 m)
Color No. 80 – basic
Color No23 – for solo and dress
2. Hook number 2
3. Filler holofiber / synthetic winterizer.
4. Eyes on a secure mount – 7 mm.
5. Scissors, needle, marker.
6. A little black, pink and white yarn (the same jeans or any other) to decorate the muzzle.
7. Button 10 mm for the dress.
The height of the finished toy is 16-17 cm
Abbreviations
MR – Amigurumi Magic ring
sc : Single Crochet
inc : Increase
dec : Decrease
st: Stitch
dc : Double Crochet
hdc: Half Double Crochet
ch : Chain
Head
1. 6 sc in MR
2. 6 inc (12)
3. (1 sc, inc)*6 (18)
4. (2 sc, inc)* 6 (24)
5. (3 sc, inc)*6 (30)
6. (4 sc, inc)*6 (36)
7. (5 sc, inc)*6 (42)
8. (6 sc, inc)*6 (48)
9 – 16. 48 sc
17. (6 sc, dec)*6 (42)
18. (5 sc, dec)*6 (36)
19. (4 sc, dec)*6 (30)
20. (3 sc, dec)*6 (24)
Finish crocheting, hide the yarn. Insert the eyes between the 13th and 14th rows, at a distance of 8 sc, we fill the Head tightly with filler.
Arms (2 parts)
We fill while crocheting to the middle.
1. 6 sc in MR
2. 6 inc (12)
3. (1 sc, inc)*6 (18)
4-5. 18 sc
6. (1 sc, dec)*6 (12)
7-21. 12 sc
We fold the hand in half, we sew 6 sc for both sides.
Legs (2 parts)
We fill while crocheting
1. 6 sc in MR
2. 6 inc (12)
3. (1 sc, inc)*6 (18)
4. (2 sc, inc) *6 (24)
5 -7. 24 sc
8. 6 sc, 6 dec, 6 sc (18)
9. 6 sc, 3 dec, 6 sc (15)
10 – 21. 15 sc
We fold the part in half, if necessary, crochet a few more sc so that the foot looks forward, then we sew 7 sc for both sides.
Body
Stuff tightly while crocheting.
1. 6 sc in MR
2. 6 inc (12)
3. (1 sc, inc)*6 (18)
4. (2 sc, inc)* 6 (24)
5. (3 sc, inc)*6 (30)
6. (4 sc, inc)*6 (36)
7. (5 sc, inc)*6 (42)
8. 42 sc
9. sew legs (42)
10 – 12. 42 sc
13. (5 sc, dec)*6 (36)
14 – 17. 36 sc
18. (4 sc, dec)*6 (30)
19 – 20, 30 sc
21. (3 sc, dec)*6 (24)
22. sew arms (24)
23. 24 sc
Finish crocheting, leave the yarn for sewing on the head.
The Dress
We crochet in turning rows.
1. We make a chain of 30 ch
2. 29 sc
3. 5 hdc, 7 ch (we skip 7 st, thereby making a hole for the arms, and start crocheting from the eighth) 5 hdc, 7 ch (again skip 7 sc, crochet with 8) 5 hdc (29)
5. We crochet in each loop З. hdc(we can not count the number of st)
6. (1 hdc, inc) – to the end of the row.
7 – 9. simple rows hdc.
Finish crocheting hide the yarn. We sew a button on the back and use a hook to make a small hole for it.
Head bandage
For the bandage, we make 5 ch and in turning rows we crochet 4 sc as many rows as you need according to the volume of the head that turned out.
Sew on the ends.
Hide the yarn.
For a knot, crochet in turning rows.
1. 2 ch
2. 2 inc (4)
3. 4 inc (8)
4. 8 sc
5. 4 dec (4)
6. 2 dec (2)
7- 13. 2 sc
14. 2 inc (4)
15. 4 inc (8)
16. 8 sc
17. 4 dec (4)
18. 2 dec (2)
19. dec, finish crocheting, hide the yarns, tie to the bandage.
Tail
1.6 sc in MR
2. (1 sc, inc)*3 (9)
3 – 4.9 sc
5. (1 sc, dec)* 3 (6)
Finish crocheting, leave the yarn for sewing, fill with a little filler.


