


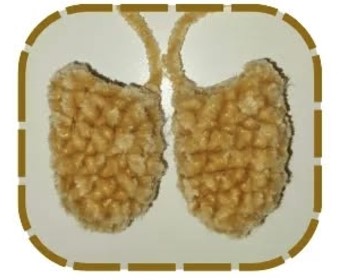
I am here today with a different gingerbread man design. The gingerbread I will share today is designed in the shape of a girl and a boy. We see that the boy-shaped doll has a bow tie, but the bow tie of the girl-shaped gingerbread doll is used as a hair clip. I do not know what brand of yarn was used in making the toy, but its texture seems quite soft.
Gingerbread Girl and Boy Amigurumi Pattern
Also, from what I understand from the texture of the yarn, I think you can get a very durable toy. No information is given about the crochet hook used, but it will be enough to choose a hook suitable for the yarn you will use.
Designer: purfect.crochet
MATERIALS:
Yarn (in three colours): Brown (Body) -Red (Bow) -White (Stripes)
Suitable crochet hook for your yarn
5mm safety eyes (or embroider eyes)
Black cotton / acrylic yarn for face details
Stitch marker, Scissors, Stuffing
Needle for sewing
ABBREVIATIONS:
MC = Magic circle
R = Round/ Row
inc = Increase
St = Stitch
dec = Decrease
SC = Single crochet
Ch = Chain
SL ST = Slip stitch
FO = Fasten off

HEAD (MAN & WOMAN):
ch 6, start crocheting in the second loop from hook
R1: 4 sc, 3 sc in 1 st, work on other side of chain, 3 sc, inc (12)
R2: inc, 3 sc, 3 inc, 3 sc, 2 inc (18)
R3: sc, inc, 3 sc, (sc, inc)x3, 3 sc, (sc, inc)x2 (24)
R4: 2sc, inc, 3 sc, (2 sc, inc) x3, 3 sc, (2 sc, inc) x2 (30)
R5-8 (4 rounds): sc around (30)
R9: 2sc, dec, 3sc, (2sc, dec) x3, 3sc, (2sc, dec) x2 (24)
R10: sc, dec, 3sc, (sc, dec) x3, 3sc, (sc, dec) x2 (18)
R11: dec, 3sc, 3dec, 3sc, 2dec (12)
Place eyes between R5-6 (4 sts apart)
Stuff firmly
FO, No need to leave tail.
Press flat for better side view

LEGS (MAN) – MAKE 2:
R1: 8sc in MC (8)
R2: 8inc (16)
R3: Sc around (16)
R4: 4sc, 4dec, 4sc (12)
R5: 4sc, 2dec, 4sc (10)
R6-8 (3 rounds): sc around (10)
Stuff slightly
Do not fasten off 2nd piece of leg, continue with body

LEGS (WOMAN) – MAKE 2:
R1: 6sc in MC (6)
R2: (2sc, inc) x2 (8)
R3-6 (4 rounds): sc around (8)
Stuff slightly
Do not fasten off 2nd piece of leg, continue with body
BODY (MAN):
From 2nd piece of leg, chain 1 and join with 1st piece with a sc
(this counts as 1st st of R9)
R9: sc around (20)
R10: 4sc, dec, 9sc, dec, 3sc (18)
R11: sc around (18)
R12: 4sc, dec, 8sc, dec, 2sc (16)
R13: sc around (16)
R14: 4sc, dec, 6sc, dec, 2sc (14)
R15: sc around (14)
R16: 4sc, dec, 5sc, dec (12)
R17: Sc around (12)
Stuff slightly
FO, Leave a long tail for sewing to the head

BODY (WOMAN):
From 2nd piece, chain 3 and join with 1st piece with a sc (this counts as 1st st of R7)
R7: 4sc, ch4, turn, (from 2nd ch of hook) 3sc, 4sc, 3sc on 1 side of the ch 3sc, 4sc, ch4, turn, (from 2nd ch of hook) 3sc, 4sc, 3sc on the other side of the ch 3sc (34)
R8: sc around (34)
R9: 5sc, 2dec, 14sc, 2dec, 7sc (30)
R10: 5sc, 2dec, 11sc, 2dec, 6sc (26)
R11: 3sc, 2dec, 10sc, 2dec, 5sc (22)
R12: 4sc, dec, 9sc, dec, 5sc (20)
R13: 4sc, dec, 8sc, dec, 4sc (18)
R14: 4sc, dec, 7sc, dec, 3sc (16) Stuff slightly
R15: 3sc, dec, 7sc, dec, 2sc (14)
R16: 3sc, dec, 5sc, dec, 2sc (12)
R17: sc around (12)
F.o, Leave a long tail for sewing

HANDS (MAN) – MAKE 2:
R1: 8sc in MC (8)
R2: (3sc, inc) x2 (10)
R3-4 (2 rounds): 10sc
R5: 2sc, 2hdc, 2dc, 2hdc, 2sc (10)
R6: 2sc, 2hdc, 2dc, 2hdc, 2sc (10)
Stuff slightly, FO. Leave a long tail for sewing
HANDS (WOMAN) – MAKE 2:
R1: 6sc in MC (6)
R2: (2sc, inc)x2 (8)
R3-7 (5 rounds): sc around (8)
Stuff slightly, FO.
Leave a long tail for sewing
BOW:
ch 7, starting in 2nd chain from 5sc, 3sc in the last st, on the other side of the chain, 4sc, inc, sl st.
FO, leave a long tail for sewing
Use the tail to twist around the middle and form a bow shape.
ASSEMBLE & DETAILS:
For the woman, you may sew on lashes around the safety eyes.

• Sew the head to the body, stitch by stitch.

• Sew on the arms. For the man, the top of the arm should be at the bottom of the head. For the woman, the top of the arm should be 1-2 stitches below the head.

• Embroider a smiley face 1 st below the eyes.
• Sew on the bow. For the woman, the bow should be at around R2-3 of head. For the man, bow should be at R16-17 of body.

• Using white yarn, sew the buttons and stripes.

