


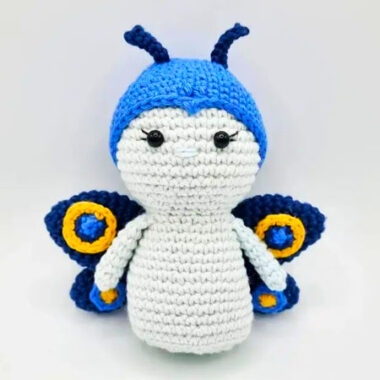
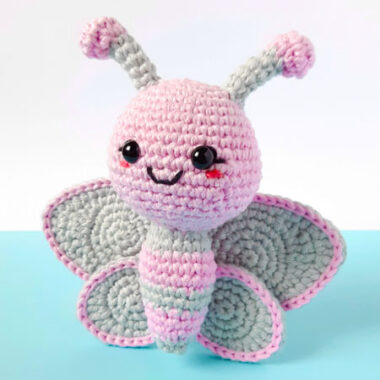
We know that butterfly amigurumi toys are usually crocheted in pink tones. One of the biggest reasons for this is that such toys are either used as accessories or as toys for girls. The body and head of the butterfly made in shades of pink are made using quartz color, but I will prefer beige or white tones.
Butterfly SLIM Amigurumi Pattern
The butterfly amigurumi toy, which has quite thick antennas, has a tiny nose. You can also add spots to the body of the butterfly if you wish. I think one of the things a butterfly needs is pink cheeks.
Designer: ateliemariale
Suggested materials
• Slim amigurumi yarn, in the colors: 7563 –
Chantilly | 3077 – Quartz | 3131 – Chiclete | 3334 – Tulip
• Crochet hook (I used 1.8mm)
• 7mm eyes
• Stuffing
• Scissors
• Tapestry needle
• Fine thread for embroidering the eyelashes
• Blush, pastel chalk or cheek paint
Legend
• hdc – half double crochet
• sl st – slip stitch
• inc – increase
• dec – decrease
• hdc inc – half double crochet increase
• MR – magic ring
• sc – single crochet
Head and body
With chantilly yarn
1– 6sc in magic ring (6)
2– inc 6x (12)
3– (1sc, inc) 6x (18)
4– (2sc, inc) 6x (24)
5– (3sc, inc) 6x (30)
6– (4sc, inc) 6x (36)
7 to 10-36sc (36)
11– 12sc, 1 ch, skip 1sc, 4sc, 1 ch, skip 1sc, 18sc
12– 9sc, (inc) 3x, 6sc, (inc) 3x, 15sc (42)
13 and 14-42sc (42)
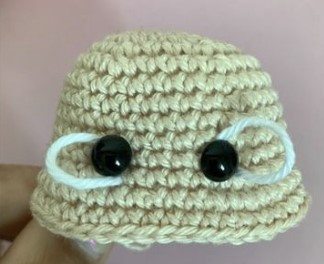
** Place the eyes in the gaps in the 11th row, before placing the locks, thread a piece of white yarn to create the shape of the eyes.
After placing the locks, burn the rod.

15– (5sc, dec)6x (36)
16– (4sc, dec)6x (30)
17– (3sc, dec)6x (24)
18– (2sc, dec)6x (18)
19-18sc (18)
20– (2sc, inc) 6x (24)
21 and 22 – 24sc (24)
23 – (3sc, inc)6x (30)
24 to 28 – 30sc (30)
29 – (3sc, dec)6x (24)
30 to 32 – 24sc (24)
33 – (2sc, dec)6x (18)
34 and 35– 18sc (18)
36– (1sc, dec) 6x (12)
37– 12sc (12)
38-dec 6x (6)
39 and 40-6sc (6)
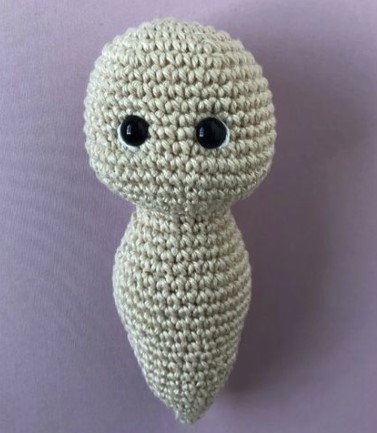
Finish with inverted magic ring, fasten off and hide the thread.
Embroider the nose in the center of the head, 1 row below the eyes.

Major wings 2x
With the gum yarn
1– 6sc in the magic ring (6)
2– inc 6x (12)
3– (1sc, inc) 6x (18)
4– (2sc, inc)6x (24)
5– (3sc, inc)6x (30)
6-8-30sc (30)
9– (dec, 13sc)2x (28)
10– (dec, 12sc)2x (26)
11– (dec, 11sc)2x (24)
12– (dec, 10sc)2x (22)
13– (dec, 9sc)2x (20)
14– (dec, 8sc)2x (18)
Fasten off and hide the yarn.

Smaller wings 2x
With quartz yarn
1– 6sc in the magic ring (6)
2– increase 6x (12)
3– (1sc, increase) 6x (18)
4-6– 18sc (18)
7– (dec, 7sc)2x (16)
8– (dec, 6sc)2x (14)
9– (dec, 5sc)2x (12)
10– (dec, 4sc)2x (10)

Do not cut the yarn, we will join in the larger wing
11– Work in the larger wing: 9sc, dec, 7sc, now in the smaller wing, 5sc, dec, 3sc. This way the decreases coincide with those of the previous row.

12– 9sc, dec, 11sc, dec, 2sc (24)
13– 8sc, dec, 10sc, dec.
Fold the fold and make 10sc to close.
Place one in front of the other and sew the middle. Then sew to the back of the body.

Antennas 2x
With tulip yarn
1– 6sc in magic ring (6)
2– inc 6x (12)
3 and 4-12sc (12)
5– dec 6x (6)
6 to 12– 6sc (6)
Fasten off. Cut the long yarn to sew.
Sew between rows 2 and 3 of the head.

Wing dots
With tulip yarn, 4x
1– 6sc in magic ring (6)
Fasten off. Cut the long thread to sew.
With tulip yarn, 2x
1– 6sc in magic ring (6)
2– inc 6x (12)
Fasten off. Cut the long thread to sew on the wings.

Assembly
Sew the dots on the wings before sewing the wings to the body.
You can glue the wings to the body with silicone glue before sewing, but it is necessary to sew.
Embroider the eyelashes with thin black thread.

Little flower: with yellow 5 sc, change to white and do: (2ch, 2dc, 2ch), sl st in the next stitch and repeat 4x.
