


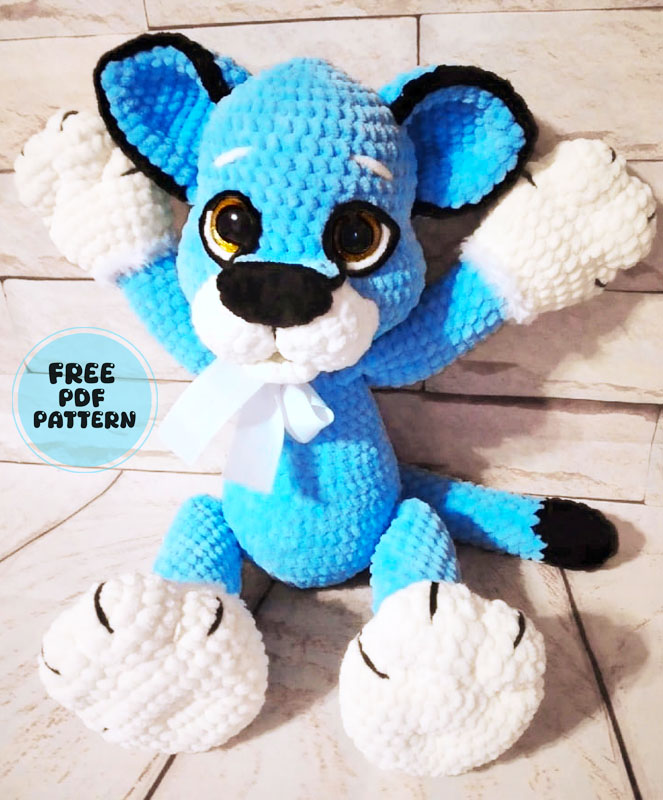
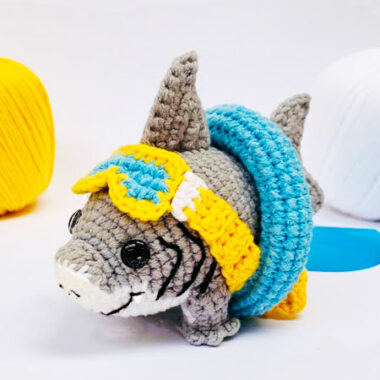
I would like to share with you the crochet pattern of a gorgeous blue puma amigurumi toy designed by Elena Morozova using plush yarn. The height of the crocheted toy is about 40 cm. This is quite a sufficient size for a plush toy. The designer used YarnArt Dolce plush yarn and a 4 mm hook to make such a large puma. During the body crocheting process, the puma’s legs, arms and tail are crocheted, and the rest are sewn.
Blue Plush Puma Crochet Pattern Step by Step
Although the puma’s eyes are made using safety eyes, shaping the eyes using black and white yarn is a very important detail.
Designer: Morozova Elena
Materials
• Yarn
• Yarn Art Dolce main color 2 skeins, white less than a skein, just a little black
• Yarn Art Jeans for claws and muzzle
• Yarn Art Mink for tying the legs
• Strong yarn in body color for sewing on head and ears
• Hook N4
• Eyes 25mm
• Filler
• Glue moment crystal
Abbreviations
MR – Amigurumi Magic ring
sc : Single Crochet
inc : Increase
dec : Decrease
st: Stitch
sl-st : Slip Stitch
ch : Chain
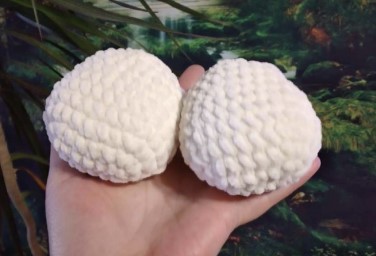
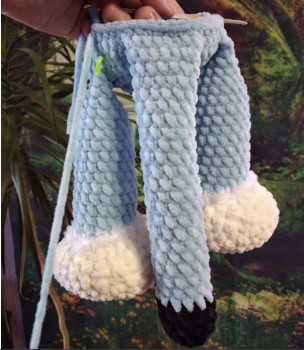
Lower legs (feet, 2 parts, white)
• 1) 7ch, in the 2nd from the loop hook: inc, 4sc, 3in 1, 4sc, inc (15)
• 2) 2inc, 4sc, 3inc, 5sc, inc(21)
• 3) (1sc, inc)*2, 4sc, (1sc, inc)*3, 6sc, inc(27)
• 4) (2sc, inc)*2, 4sc, (2sc, inc)*3, 7sc, inc(33)
• 5-7)33sc(3 row)
• 8) (9sc, dec)*3 (30)
• 9-10) 30sc
• 11) (3sc, dec)*6 (24)
• 12) (2sc, dec)*6 (18)
• 13) (1sc, dec)*6 (12)
• 14) 6dec, pull off the hole, cut the yarn and hide.
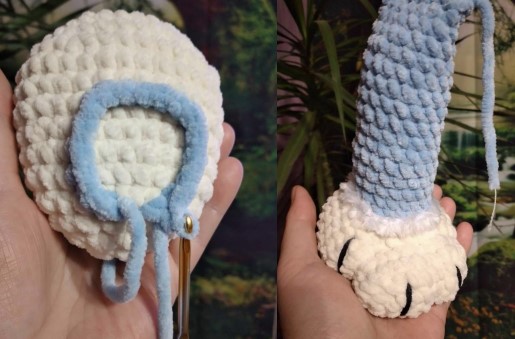
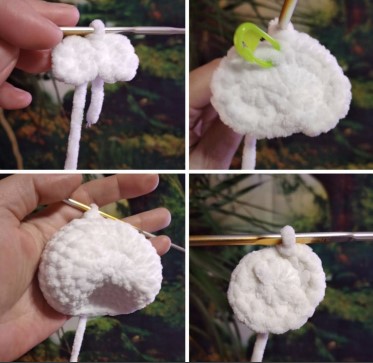
We continue to Crochet paws
On the foot from the center of the heel in a circle, crocheting between the loops, we crochet 18sc with the body color
If this method is not familiar, you can make a chain of 18ch, close it in a ring and crochet in a circle, then sew to the foot
• 1-10) 18sc
• 11) 3sc, dec, 8sc, dec, 3sc(16)
• 12) 16sc
• 13) 3sc, dec, 6sc, dec, 3sc(14)
• 14) 14sc
• 15) If necessary, crochet offset loops so that the yarn is exactly in the middle of the heel, fold in half and sew with 7sc behind both side, fasten and hide the yarn.
Upper legs (2 pieces, white)
• 1-3) Like the lower legs
• 4-6) 27sc
• 7) (7sc, dec)*3 (24)
• 8-9)24 sc
• 10) (2sc, dec)*6 (18)
• 11) (4sc, dec)*3 (15)
• Change the color to the main one
• 12-21) 15sc
• 22) (3sc, dec)*3 (12)
• 23) 12sc
• Fold in half and sew on both sides 6sc

Make finger ties, embroider claws, tie around the edge of the Yarn Art Mink color change (also on legs)
Tail
We start with black
• 1) 2ch, second loop from hook 8sc (8)
• 2) (1sc, inc)*4 (12)
• 3-5) 12sc
Change the color to the main one
20 rows in the main color
5sc, inc, 5sc, inc (14)
Fold in half and sew together with 7sc
Body
• Start with main color
• 1) 2ch, second loop from hook 6sc
• 2) 6inc(12)
• 3) (1sc, inc)*6 (18)
• 4) (2sc, inc)*6 (24)
• 5) (3sc, inc)*6 (30)
• 6) 2sc, inc,(4sc, inc)*5, 2sc(36)
• 7) (5sc, inc)*6 (42)
• 8) 3sc, inc,(6sc, inc)*5, 3sc(48)
• 9) Sew lower legs: 7sc together with the presser foot, 17 sc, 7sc together with the second presser foot, 17sc (48)
• 10) sew the tail (you can sew it as you like) 36sc, 7sc together with the tail, 5sc (48)
• 11-12) 48sc
• 13) (6sc, dec)*6 (42)
• 14) 42sc
• 15) 7sc, 6dec, 23sc(36) Decreases should be in the middle of the belly
• 16) 36sc
• 17) (4sc, dec)*6 (30)
• 18-19) 30sc
• 20) (3sc, dec)*6 (24)
• 21-22) 24sc
• 23) 6sc with foot, 6sc, 6sc with second foot, 6sc (24)
• 24) (2sc, dec)*6 (18)
• 25) 18sc, yarn to fasten and cut
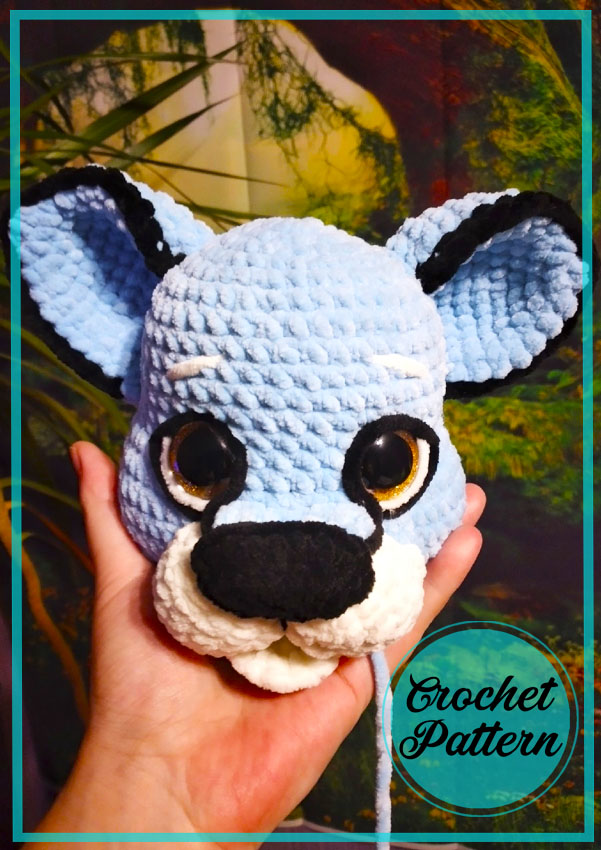
Head
• 1) 2ch second loop from hook 8sc
• 2) 8inc(16)
• 3)(1sc, inc)*8 (24)
• 4) (3sc, inc)*6 (30)
• 5) (4sc, inc)*6 (36)
• 6) (5sc, inc)*6 (42)
• 7-13) 42sc
• Insert the eyes between 13 and 14, between the eyes 8sc
• 14) 10sc, 6inc, 10sc, 6inc, 10sc(54)
• 15-18) 54sc
• 19) 10sc,(1sc, dec)*4, 10sc, (1sc, dec)*4, 10sc(46sc)
• 20) 12sc, 2dec, 14sc, 2dec, 12sc(42)
• 21) (5sc, dec)*6 (36)
• 22) 2sc, dec, (4sc, dec)*5, 2sc (30)
• 23) (3sc, dec)*6 (24)
• 24) (2sc, dec)*6 (18)
Fasten and cut the yarn
Ears
• 1) 2ch, second loop from hook 6 loops
• 2) 6inc
• 3) (1sc, inc)*6 (18)
• 4) (2sc, inc)*6(24)
• 5) (3sc, inc)*6(30)
• 6-9) 30sc
• Fold in half and sew by both sides 15sc
• Crochet around the edge in black
Muzzle
• 1) 2ch, in the second loop from the hook 6 loops, 2ch, in the second 6 loops (12)
• 2) 12inc(24)
• 3)(1sc, inc)*12(36)
• 4-6)36sc
• Cut and fasten the yarn
• Lip
• 1) 2ch, second from hook 8sc
• 2) 5inc, slst, cut the yarn, leaving it to be attached to the muzzle
• Nose
• 1) 6ch, from the second from the hook inc, 3sc, 3in1, on the other side of the chain 1sc, one double crochet, 1sc, inc, fasten and cut the yarn
Assembly and design
• At the level of the 15th row between the eyes, we type in the same way as on the legs 7sc, turn 7sc, turn 7sc, cut and fasten the yarn (this will be an overlay on the muzzle)
• Carefully fill the muzzle and sew it under the nose pad, separate the muzzle with a black yarn, sew on the nose (I glued the nose), sew on the bottom, embroider the whites of the eyes and the edging of the muzzle and eyes, embroider eyebrows, tie a bow and the toy is ready
