


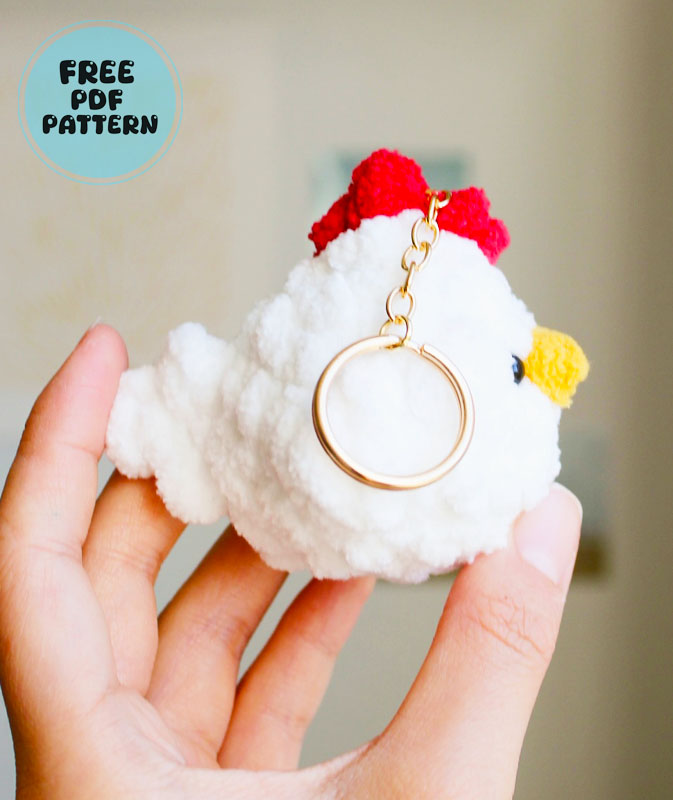
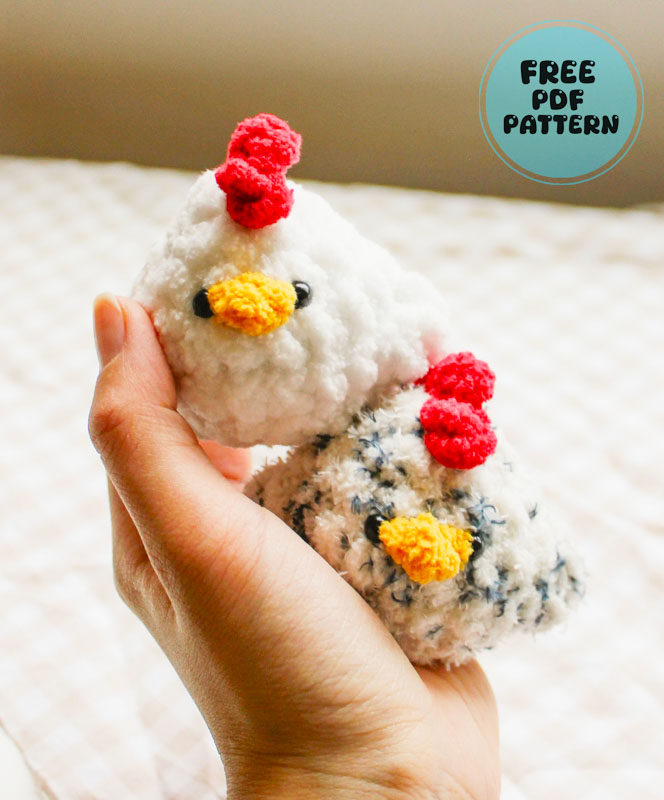
Easter is approaching, and you can already start making a crochet keychain for the holiday. By dedicating a few hours a day, it is possible to complete this adorable keychain within a few days or a week. Although you will need to use techniques like the puff stitch to make the crochet chicken, using these techniques a few times will be enough. Additionally, you can make the toy in one single piece without any sewing. For this, you first need to crochet the toy’s comb, tail, and beak.
Mini Chicken Keychain Amigurumi Pattern
The designer uses velvet yarn and a 6.5mm hook to crochet the toy. For the eyes, the designer suggests using 6mm safety eyes. It is possible to customize the toy, but I do not recommend changing much other than the color. Let’s get started if you’re ready.
Designer: cozybirdclub
MATERIALS
• Blanket or Velvet Yarn: Body Color, Yellow, Red
• 6 mm black safety eyes
• Poly-fil stuffing
• Size K/6.5 mm crochet hook
• Yarn needle
• Scissors
• Hot Glue Gun
• Keychain
FINISHED DIMENSIONS
2.5″ tall x 3″ wide x 3″ long (not including keychain)
ABBREVIATAIONS
sc – single crochet
inc – 2 sc in each stitch
dec – single crochet decrease
MC – magic circle
ch – chain
COMB
Using red yarn
Begin without a slip knot by wrapping the yarn around the hook as shown in the first picture.
Leave an 8″ tail strand for sewing later.
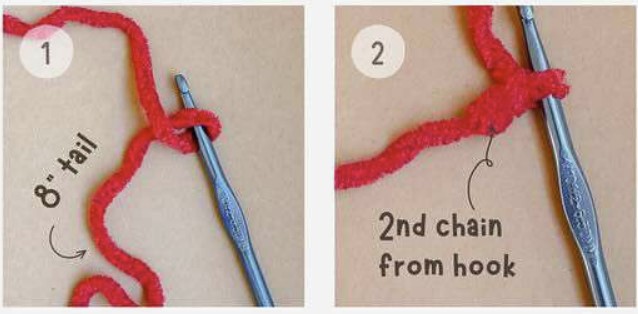
Ch 2, sl st in the 2nd chain from the hook.
Ch 2, sl st in the 2nd chain from the hook.
Ch 2, sl st in the 2nd chain from the hook.
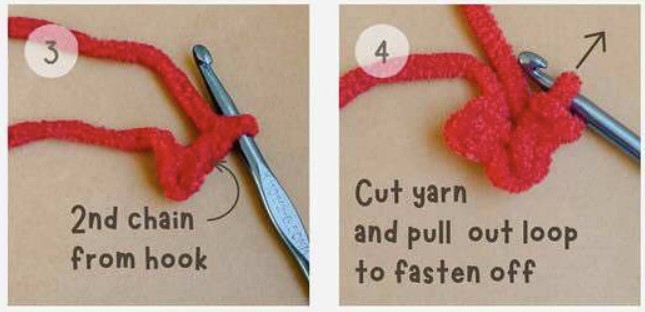
Cut the yarn, leaving an 8″ tail, and pull out the loop on the hook to fasten off.

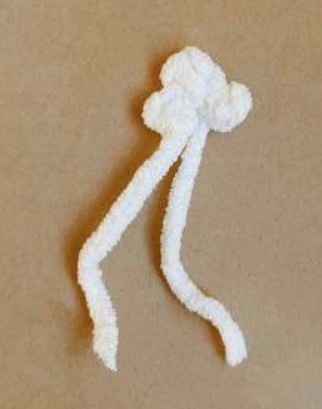
TAIL
Using body color yarn
The tail is worked very similarly to the comb.
Begin without a slip knot. Leave a 3″ tail strand for attaching the tail later.
Ch 2, sl st in the 2nd chain from the hook.
Ch 3, sl st in the 3rd chain from the hook.
Ch 2, sl st in the 2nd chain from the hook.
Cut the yarn, leaving a 3″ tail, and pull out the loop on the hook to fasten off.
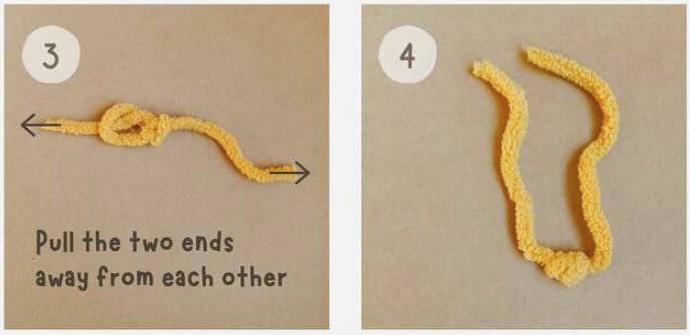
BEAK
Using yellow yarn
In a magic circle, sl st.
Cut the yarn, leaving a 3″ tail, and pull out the loop on the hook to fasten off.

Gently pull the two tail ends away from each other to close the magic circle. The beak should form a triangular shape.
BODY
Using body color yarn
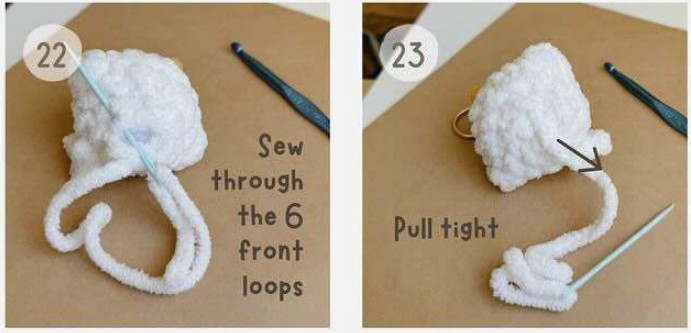
Round 1: 6 sc in magic circle (6)
Attach the comb: use your crochet hook to pull the comb strands through stitches 3 and 6

Round 2: *2 inc, sc* repeat 2x (10)
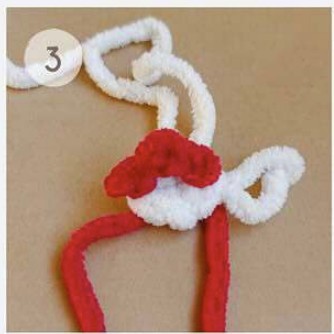
Round 3: *inc, sc* repeat 5x (15)
Attach the beak: pull the beak strands through stitches 6 and 8 of Round 3
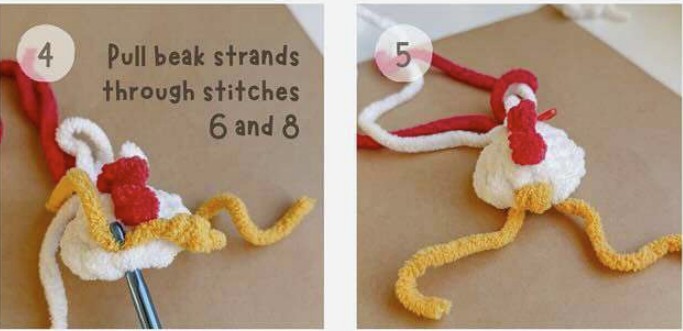
Round 4: *inc, 4 sc* repeat 3x (18)
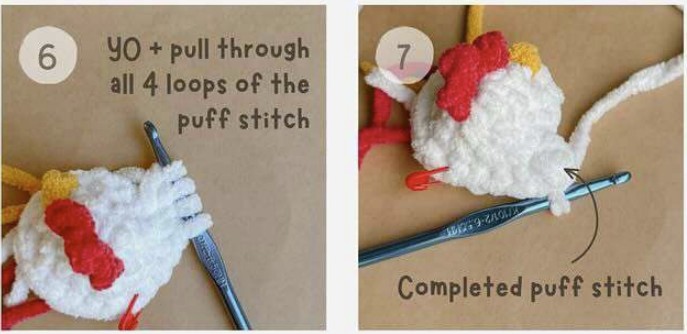
Round 5: 3 sc, 3 dc puff stitch, 8 sc, 3 dc puff stitch, 5 sc (18)
3 dc puff stitch: *YO, insert hook into stitch, YO, pull through the stitch, YO, pull through the first two loops on the hook* repeat 3x in the same stitch, then YO and pull through all 4 loops on the hook.
• Attach the tail: use your crochet hook to pull the loose strands for the tail through the last stitch of round 5 and the stitch directly above it (where you inserted your hook to create the last sc of round 5)
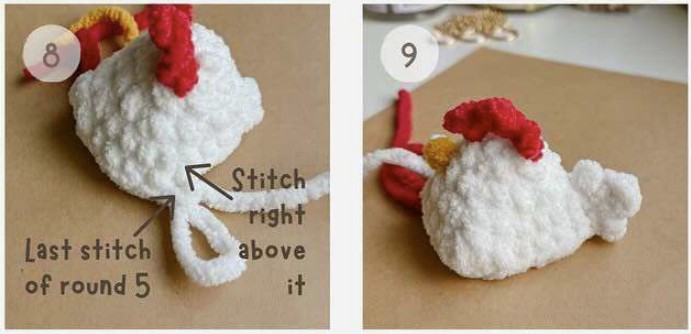
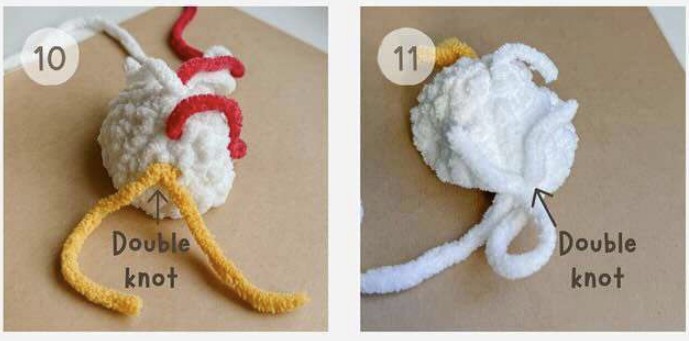
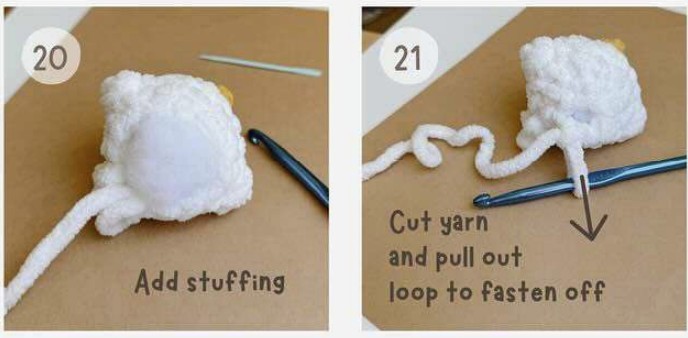
• Flip the body inside out and secure the beak and tail by tying double knots with the loose strands. Cut off the extra yarn.
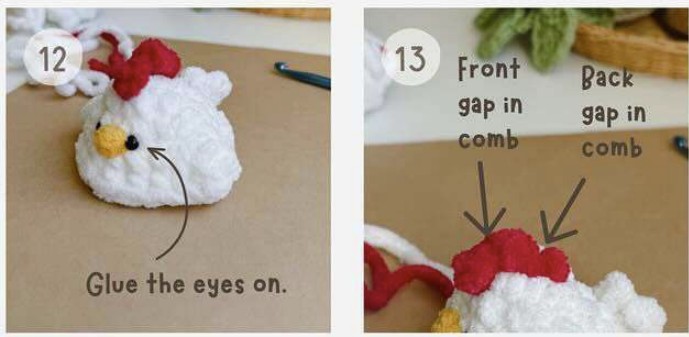
• Attach the eyes: on either side of the beak. I use a drop of hot glue on the end of the eyes instead of the safety backing to secure the eyes because they are small and can get pushed through to the inside.
Sew the comb and keychain:
• Back gap: thread one comb strand through a yarn needle.
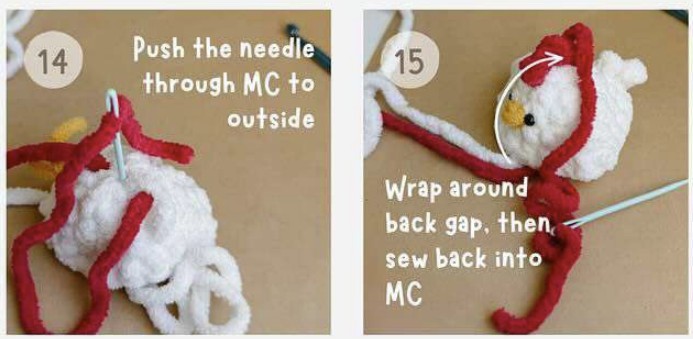
• From the inside, sew through the MC to the outside. Wrap the yarn around the back gap in the comb, then sew back into the MC.

On the inside, sew through a nearby stitch and pull tight to secure.
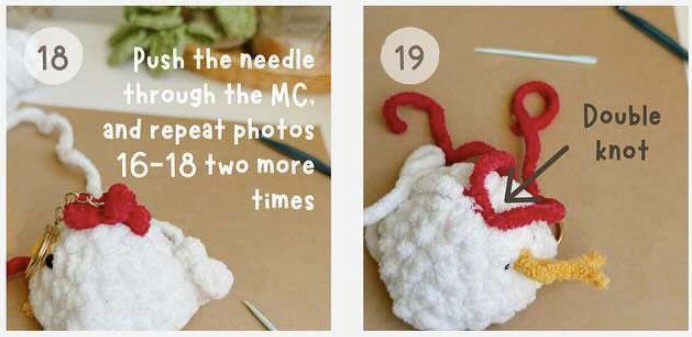
• Front gap: Sew through the MC to the outside. Sew through the keychain, then around the front gap, and back into the MC.
On the inside, sew through a nearby stitch and pull tight to secure.
Repeat this two more times to make sure the keychain is tightly attached.
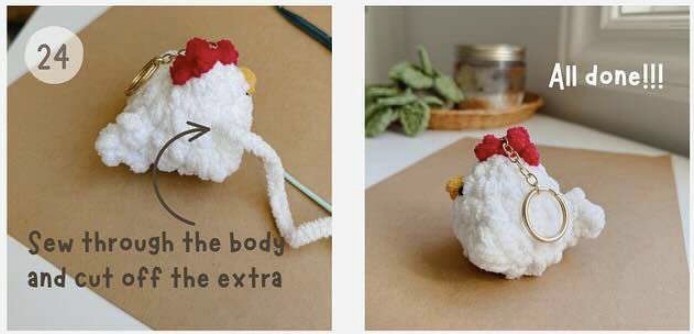
• On the inside, double knot the comb ends and trim.
